クロスプラットフォームモバイルアプリケーションの作成
コード例: tutorial-client-kmp
Ktor HTTPクライアントは、マルチプラットフォームプロジェクトで使用できます。このチュートリアルでは、リクエストを送信し、レスポンスボディをプレーンなHTMLテキストとして受信する、シンプルなKotlin Multiplatform Mobileアプリケーションを作成します。
前提条件
まず、適切なオペレーティングシステムに必要なツールをインストールして、クロスプラットフォームモバイル開発用の環境をセットアップする必要があります。セットアップ方法は、環境のセットアップセクションで確認してください。
iOS固有のコードの記述やiOSアプリケーションの実行など、このチュートリアルの特定のステップを完了するには、macOSを搭載したMacが必要です。
新しいプロジェクトの作成
新しいプロジェクトを作成するには、IntelliJ IDEAのKotlin Multiplatformプロジェクトウィザードを使用できます。これにより、クライアントやサービスを追加して拡張できる基本的なマルチプラットフォームプロジェクトが作成されます。
- IntelliJ IDEAを起動します。
- IntelliJ IDEAで、File | New | Projectを選択します。
- 左側のパネルで、Kotlin Multiplatformを選択します。
- New Projectウィンドウで以下の項目を指定します:
- Name: KmpKtor
- Group: com.example.ktor
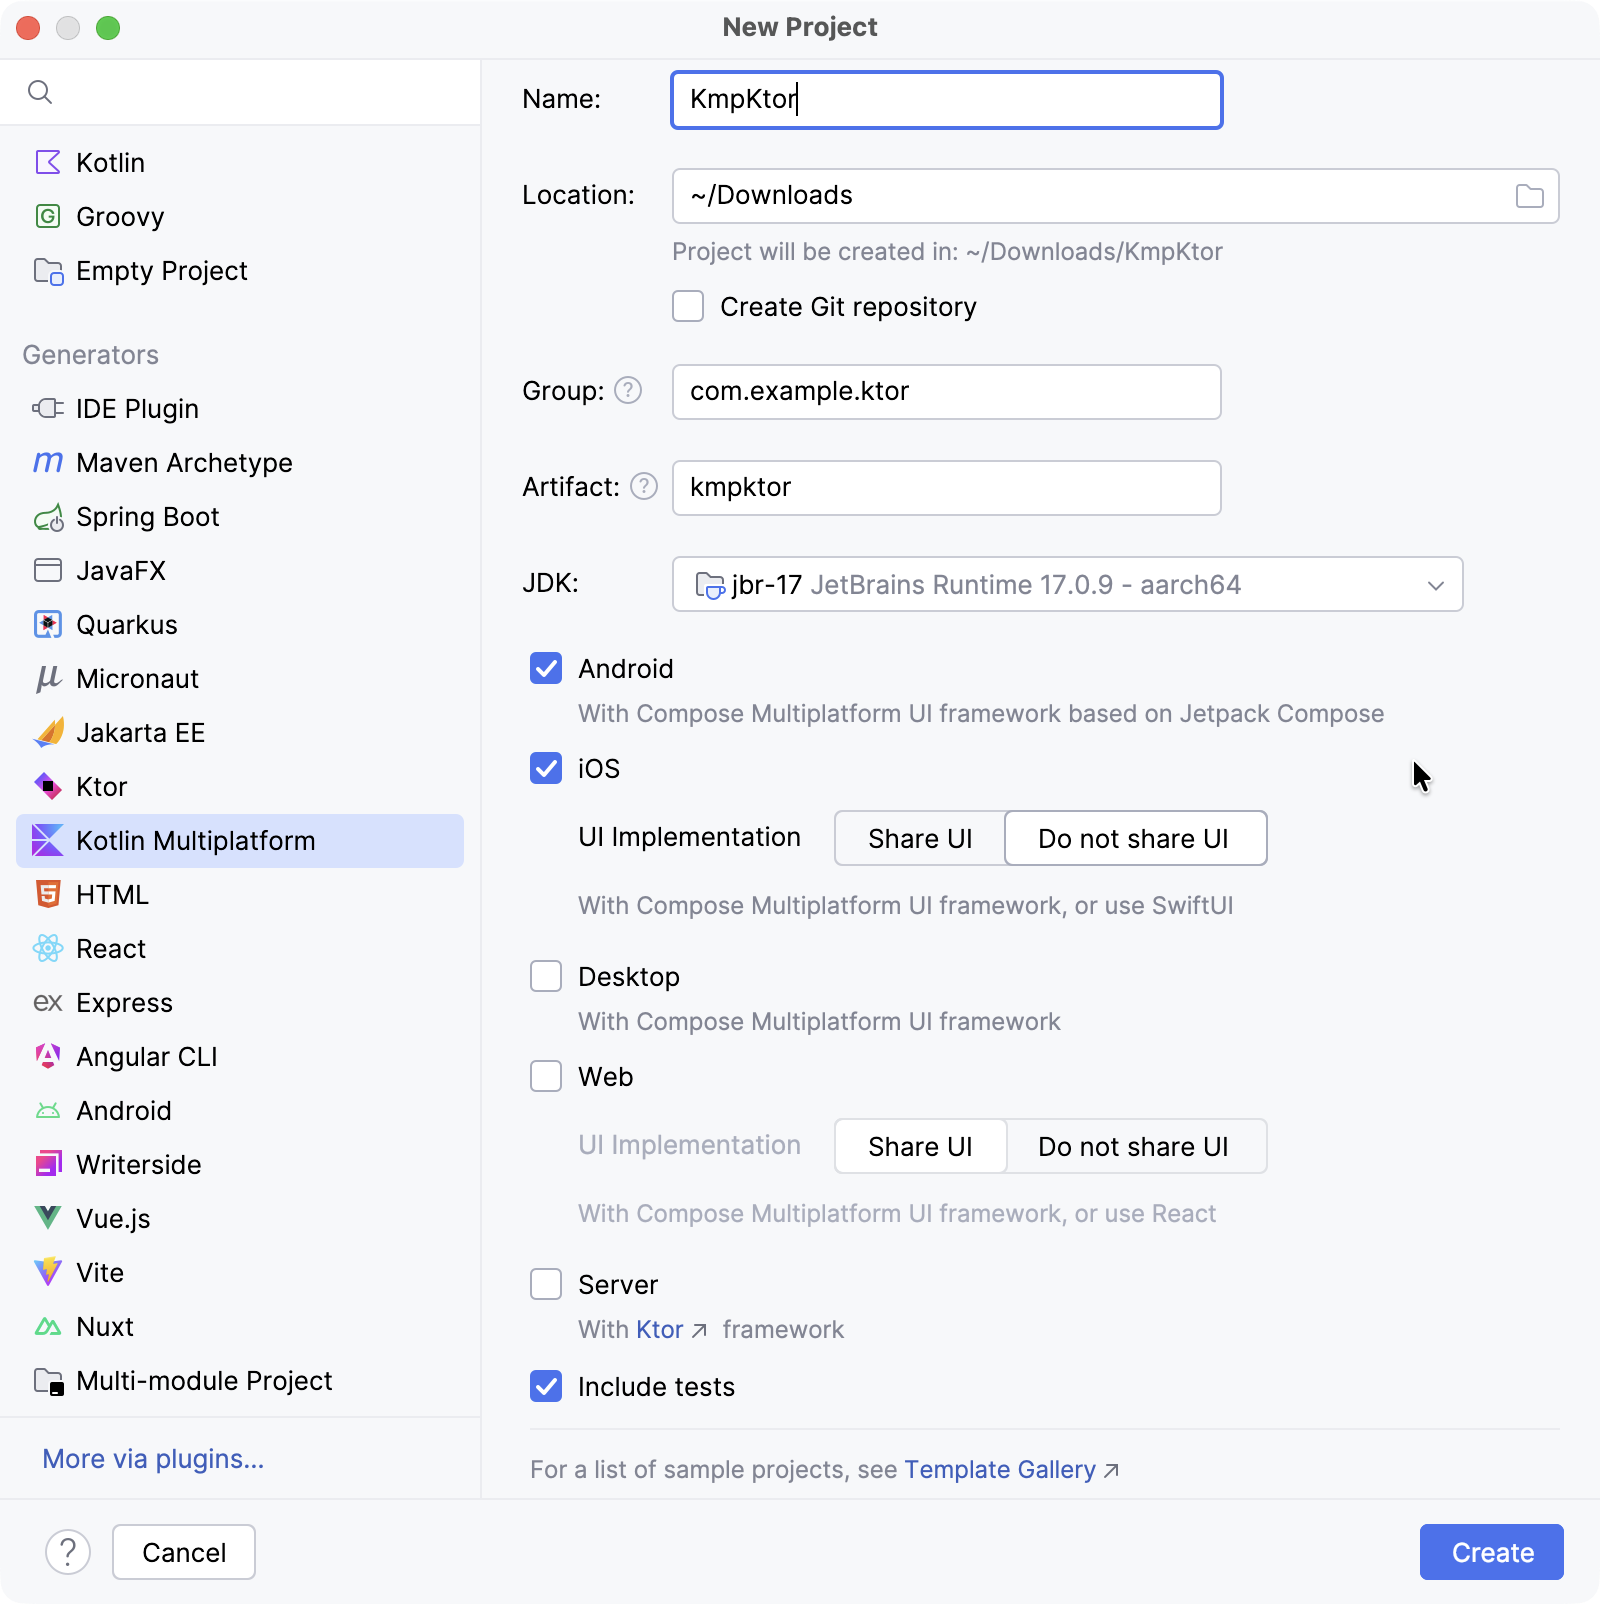
- AndroidおよびiOSターゲットを選択します。
- iOSについては、UIをネイティブに保つためにDo not share UIオプションを選択します。
- Createボタンをクリックし、IDEがプロジェクトを生成してインポートするのを待ちます。
ビルドスクリプトの構成
Ktorの依存関係を追加する
プロジェクトでKtor HTTPクライアントを使用するには、少なくとも2つの依存関係を追加する必要があります。クライアントの依存関係とエンジンの依存関係です。
- gradle/libs.versions.toml ファイルを開き、Ktorのバージョンを追加します:kotlin
[versions]
ktor = "3.4.0"
同じ gradle/libs.versions.toml 内で、Ktorクライアントおよびエンジンライブラリを定義します:
kotlin[libraries] ktor-client-core = { module = "io.ktor:ktor-client-core", version.ref = "ktor" } ktor-client-okhttp = { module = "io.ktor:ktor-client-okhttp", version.ref = "ktor" } ktor-client-darwin = { module = "io.ktor:ktor-client-darwin", version.ref = "ktor" }- shared/build.gradle.kts ファイルを開き、以下の依存関係を追加します:kotlin
sourceSets { commonMain.dependencies { implementation(libs.ktor.client.core) } androidMain.dependencies { implementation(libs.ktor.client.okhttp) } iosMain.dependencies { implementation(libs.ktor.client.darwin) } }- 共有コードでKtorクライアント機能を有効にするために、
commonMainソースセットにktor-client-coreを追加します。 androidMainソースセットには、AndroidでOkHttpエンジンを使用するためにktor-client-okhttp依存関係を含めます。あるいは、他の利用可能なAndroid/JVMエンジンから選択することもできます。iosMainソースセットには、iOSでDarwinエンジンを使用するためにktor-client-darwin依存関係を追加します。
- 共有コードでKtorクライアント機能を有効にするために、
コルーチンの追加
Androidコードでコルーチンを使用するには、プロジェクトに kotlinx.coroutines を追加する必要があります。
- gradle/libs.versions.toml ファイルを開き、コルーチンのバージョンとライブラリを指定します:kotlin
[versions] kotlinx-coroutines = "1.10.2" [libraries] kotlinx-coroutines-core = { module = "org.jetbrains.kotlinx:kotlinx-coroutines-core", version.ref = "kotlinx-coroutines" } kotlinx-coroutines-android = { module = "org.jetbrains.kotlinx:kotlinx-coroutines-android", version.ref = "kotlinx-coroutines" } - shared/build.gradle.kts ファイルを開き、
commonMainソースセットにkotlinx-coroutines-core依存関係を追加します:kotlinsourceSets { commonMain.dependencies { implementation(libs.ktor.client.core) implementation(libs.kotlinx.coroutines.core) } } 次に、composeApp/build.gradle.kts ファイルを開き、
androidMainソースセットにkotlinx-coroutines-android依存関係を追加します:kotlinsourceSets { androidMain.dependencies { // ... implementation(libs.kotlinx.coroutines.android) } }Build | Sync Project with Gradle Files を選択して、追加した依存関係をインストールします。
アプリケーションの更新
共有コード
AndroidとiOSの間で共有されるコードを更新するには、
shared/src/commonMain/kotlin/com/example/ktor/kmpktor/Greeting.ktファイルを開き、Greeting クラスに以下のコードを追加します:
package com.example.ktor.kmpktor

import io.ktor.client.HttpClient
import io.ktor.client.request.get
import io.ktor.client.statement.bodyAsText

class Greeting {
    private val client = HttpClient()

    suspend fun greet(): String {
        val response = client.get("https://ktor.io/docs/")
        return response.bodyAsText()
    }
}Androidコード
composeApp/src/androidMain/kotlin/com/example/ktor/kmpktor/App.ktファイルを開き、コードを次のように更新します:
package com.example.ktor.kmpktor

import androidx.compose.foundation.background
import androidx.compose.foundation.layout.Column
import androidx.compose.foundation.layout.fillMaxSize
import androidx.compose.foundation.layout.safeContentPadding
import androidx.compose.material3.MaterialTheme
import androidx.compose.material3.Text
import androidx.compose.runtime.*
import androidx.compose.ui.Alignment
import androidx.compose.ui.Modifier
import org.jetbrains.compose.ui.tooling.preview.Preview

@Composable
@Preview
fun App() {
    MaterialTheme {
        Column(
            modifier = Modifier
                .background(MaterialTheme.colorScheme.primaryContainer)
                .safeContentPadding()
                .fillMaxSize(),
            horizontalAlignment = Alignment.CenterHorizontally,
        ) {
            var text by remember { mutableStateOf("Loading") }
            LaunchedEffect(true) {
                text = try {
                    Greeting().greet()
                } catch (e: Exception) {
                    e.message ?: "error"
                }
            }
            GreetingView(text)
        }
    }
}

@Composable
fun GreetingView(text: String) {
    Text(text = text)
}

@Preview
@Composable
fun DefaultPreview() {
    MaterialTheme {
        GreetingView("Hello, Android!")
    }
}
LaunchedEffect() はコンポーザブルのライフサイクルに紐づいたコルーチンを開始します。このコルーチン内で共有の greet() 関数が呼び出され、その結果が text に代入されます。また、例外が発生した場合はキャッチして処理されます。
iOSコード
iosApp/iosApp/ContentView.swiftファイルを開き、コードを次のように更新します:
import SwiftUI
import Shared

struct ContentView: View {
    @StateObject private var viewModel = ViewModel()

    var body: some View {
        Text(viewModel.text)
    }
}

extension ContentView {
    @MainActor
    class ViewModel: ObservableObject {
        @Published var text = "Loading..."
        init() {
            Greeting().greet { greeting, error in
                if let greeting = greeting {
                    self.text = greeting
                } else {
                    self.text = error?.localizedDescription ?? "error"
                }
            }
        }
    }
}iOSでは、greet() サスペンド関数はコールバック付きの関数として利用可能です。
Androidでのインターネットアクセスを有効にする
最後のステップは、Androidアプリケーションでインターネットアクセスを有効にすることです。
composeApp/src/androidMain/AndroidManifest.xmlファイルを開き、<uses-permission> 要素を使用して必要な権限を有効にします:
<manifest>
<uses-permission android:name="android.permission.INTERNET" />
<application>
...
</application>
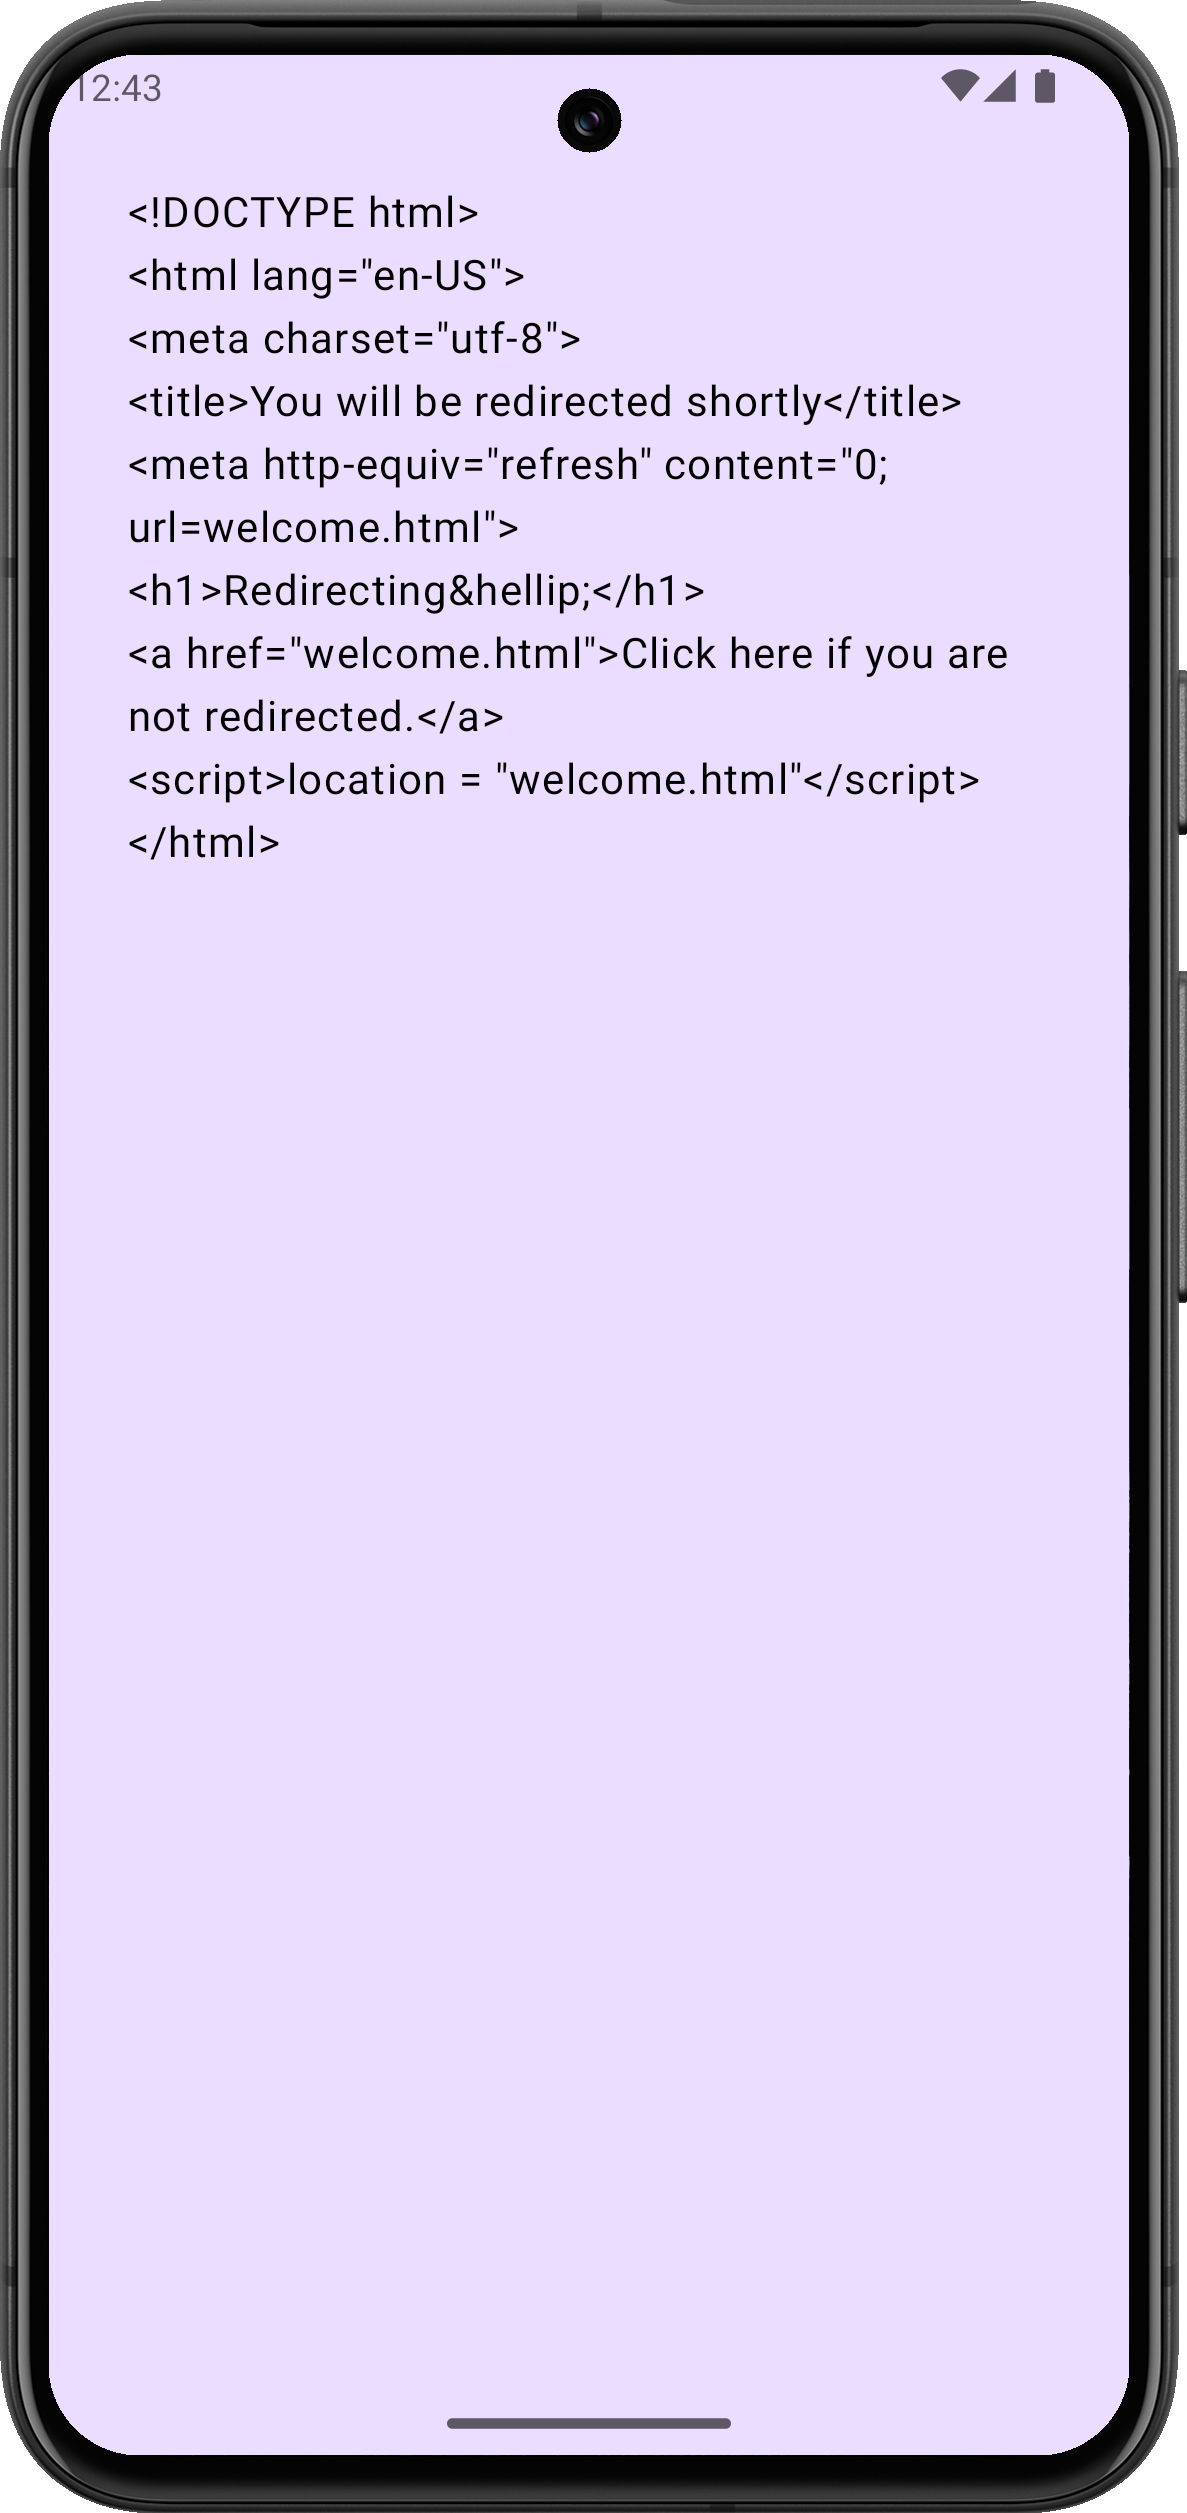
</manifest>Androidでアプリケーションを実行する
IntelliJ IDEAで、実行構成のリストから composeApp を選択します。
構成リストの隣にあるAndroid仮想デバイスを選択し、Run をクリックします。

リストにデバイスがない場合は、新しいAndroid仮想デバイスを作成してください。
読み込みが完了すると、シミュレーターに受信したHTMLドキュメントがプレーンテキストとして表示されるはずです。
Androidエミュレーターがインターネットに接続できない場合は、コールドブートを試してください。 Device Manager ツールウィンドウで、停止しているデバイスの横にある ⋮ (3つの点) をクリックし、メニューから Cold Boot を選択します。これにより、接続の問題を引き起こす可能性がある破損したエミュレーターキャッシュがクリアされることがよくあります。
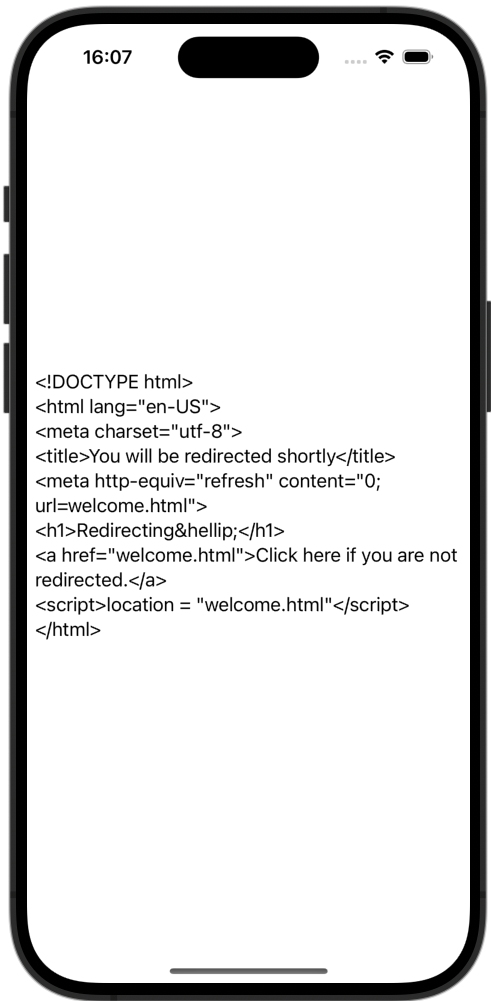
iOSでアプリケーションを実行する
IntelliJ IDEAで、実行構成のリストから iosApp を選択します。
構成リストの隣にあるiOSシミュレートデバイスを選択し、Run をクリックします。

リストに利用可能なiOS構成がない場合は、新しい実行構成を追加してください。
読み込みが完了すると、シミュレーターに受信したHTMLドキュメントがプレーンテキストとして表示されるはずです。