向项目添加依赖项
本教程使用 IntelliJ IDEA,但您也可以在 Android Studio 中学习——这两个 IDE 共享相同的核心功能和 Kotlin Multiplatform 支持。
这是使用共享逻辑和原生 UI 创建 Kotlin Multiplatform 应用教程的第三部分。在继续之前,请确保您已完成之前的步骤。
![]()
您已经创建并调整了您的第一个 Kotlin Multiplatform 项目! 现在让我们学习如何向第三方库添加依赖项,这对于构建成功的跨平台应用程序至关重要。
依赖项类型
在 Kotlin Multiplatform 项目中,您可以使用两种类型的依赖项:
多平台依赖项。这些是支持多个目标平台的多平台库,可以在公共源集
commonMain中使用。许多现代 Android 库已经提供了多平台支持,例如 Koin、Coil 和 SQLDelight。您可以在 klibs.io 上找到更多多平台库,这是由 JetBrains 提供的一项用于发现 Kotlin Multiplatform 库的实验性搜索服务。
原生依赖项。这些是来自特定生态系统的平台特定库。 在原生项目中,您通常通过平台特定工具来管理这些库,例如在 Android 中使用 Gradle,在 iOS 中使用 Swift 软件包管理器。
在处理多平台项目模块时,通常仍需要原生依赖项来使用平台 API,如安全存储、系统调用等。 在构建脚本中,您可以在原生源集的配置中指定原生依赖项,例如
androidMain和iosMain。
对于这两种类型的依赖项,您都可以使用本地和外部仓库。
添加多平台依赖项
如果您有开发 Android 应用的经验,添加多平台依赖项与在普通 Android 项目中添加 Gradle 依赖项类似。唯一的区别是您需要将其添加到特定的源集,而不是整个模块。
让我们让问候语更具节日气氛: 除了操作系统版本,再添加一个函数来显示距离元旦还有多少天。 kotlinx-datetime 库具有完整的多平台支持,是在共享代码中处理日期的最便捷方式。
打开
gradle/libs.versions.toml文件,将kotlinx-datetime依赖项添加到版本目录:toml[versions] kotlinx-datetime = "0.8.0" [libraries] kotlinx-datetime = { module = "org.jetbrains.kotlinx:kotlinx-datetime", version.ref = "kotlinx-datetime" }打开
sharedLogic/build.gradle.kts文件,在配置公共代码源集的区域添加对该库条目的引用:kotlinkotlin { //... sourceSets { commonMain.dependencies { implementation(libs.kotlinx.datetime) } } }选择 Build | Sync Project with Gradle Files 菜单项,或点击构建脚本编辑器中的 Sync Gradle Changes 按钮来同步 Gradle 文件:

调用 kotlinx-datetime API
添加依赖项后,您可以向公共代码添加日期和时间计算逻辑:
右键点击
sharedLogic/src/commonMain/.../greetingkmp目录,选择 New | Kotlin Class/File 以创建一个新文件NewYear.kt。在
NewYear.kt中,添加两个函数,使用datetime的日期算术逻辑计算从今天到明年开始的天数,并生成要显示的短语:kotlinfun daysUntilNewYear(): Int { val today = Clock.System.todayIn(TimeZone.currentSystemDefault()) val closestNewYear = LocalDate(today.year + 1, 1, 1) return today.daysUntil(closestNewYear) } fun daysPhrase(): String = "There are only ${daysUntilNewYear()} days left until New Year! 🎆"根据 IDE 的建议添加所有必需的导入。 确保导入的是
kotlin.time.Clock,而不是kotlinx.datetime.Clock。在
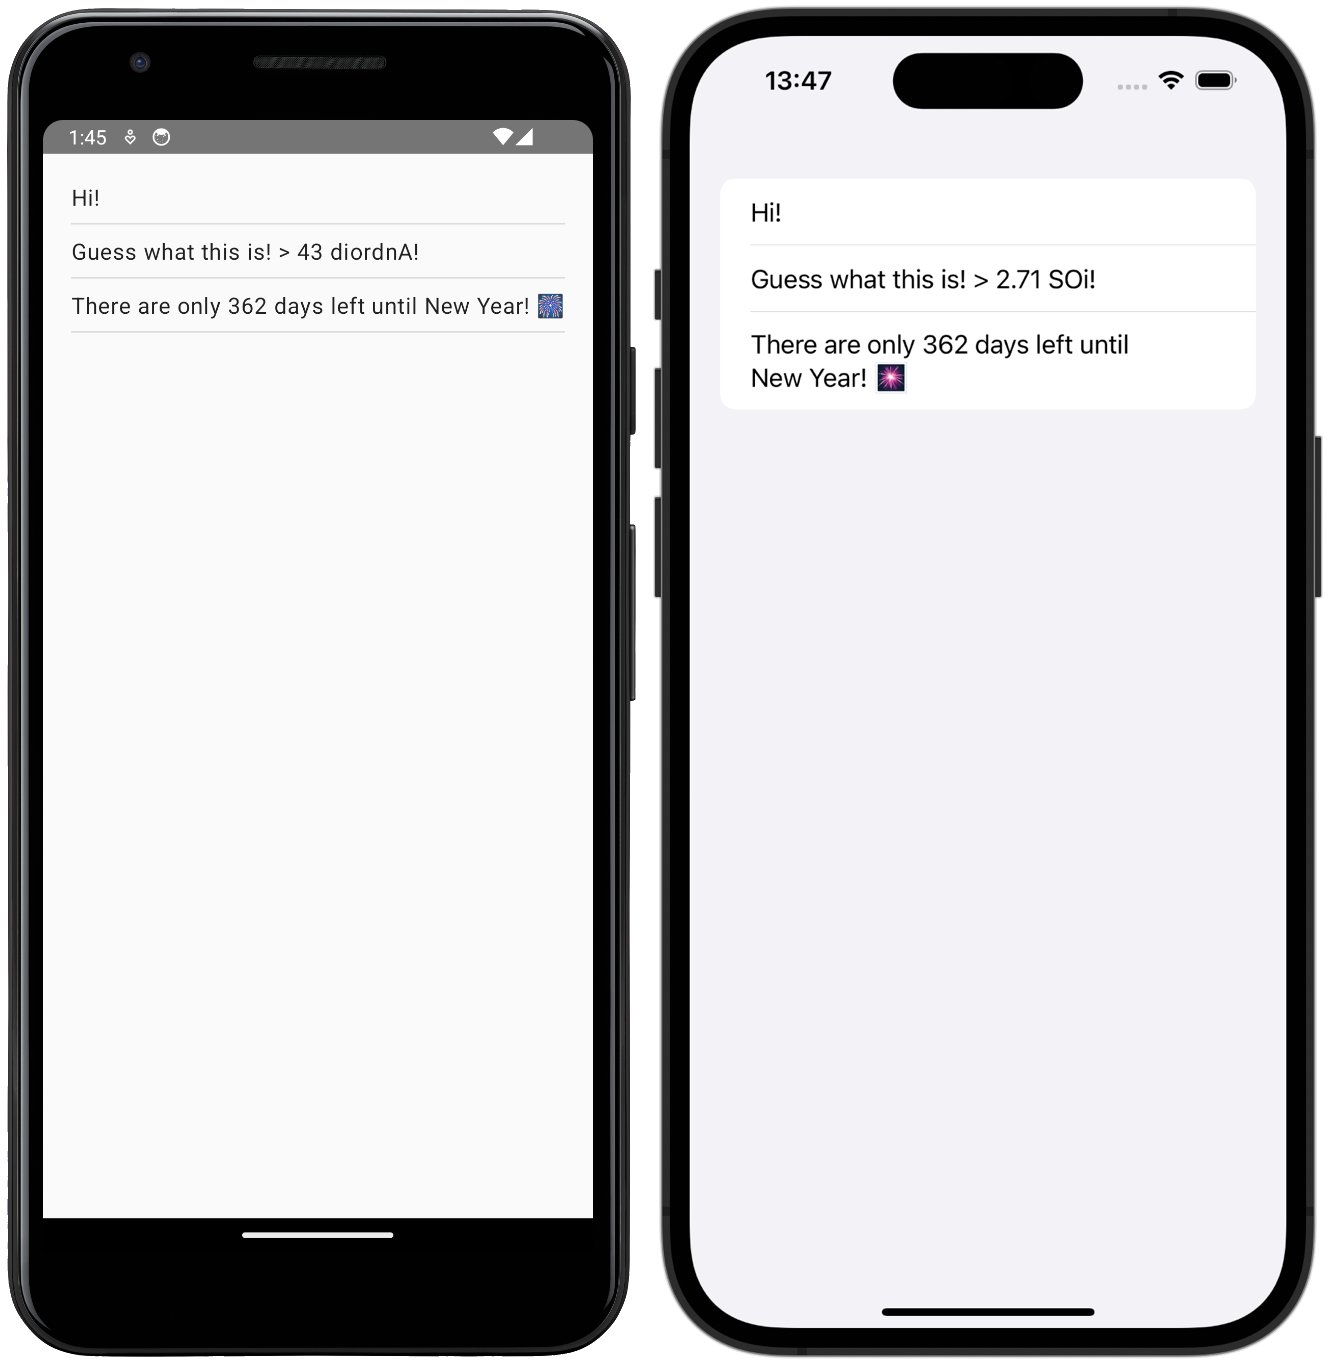
Greeting.kt文件中,更新Greeting类以查看结果:kotlinclass Greeting { private val platform: Platform = getPlatform() fun greet(): List<String> = buildList { add(if (Random.nextBoolean()) "Hi!" else "Hello!") add("Guess what this is! > ${platform.name.reversed()}!") add(daysPhrase()) } }要查看结果,请在 IntelliJ IDEA 中重新运行您的 androidApp 和 iosApp 运行配置:
下一步
在教程的下一部分,您将向项目添加更多依赖项和更复杂的逻辑。
另请参阅
- 了解如何处理各种多平台依赖项:Kotlin 库、Kotlin Multiplatform 库和其他多平台项目。
- 了解如何添加 Android 依赖项以及在使用或不使用 CocoaPods 的情况下添加 iOS 依赖项,以便在平台特定的源集中使用。
- 查看示例项目中如何使用 Android 和 iOS 库的示例。
获取帮助
- Kotlin Slack。获取邀请并加入 #multiplatform 频道。
- Kotlin 问题跟踪器。报告新问题。