與 SwiftUI 框架整合
Compose Multiplatform 可與 SwiftUI 框架互通。 您可以在 SwiftUI 應用程式中嵌入 Compose Multiplatform,也可以在 Compose Multiplatform UI 中嵌入原生的 SwiftUI 元件。本頁提供了在 SwiftUI 中使用 Compose Multiplatform 以及在 Compose Multiplatform 應用程式中嵌入 SwiftUI 的範例。
要了解 UIKit 互通性,請參閱與 UIKit 框架整合文章。
在 SwiftUI 應用程式中使用 Compose Multiplatform
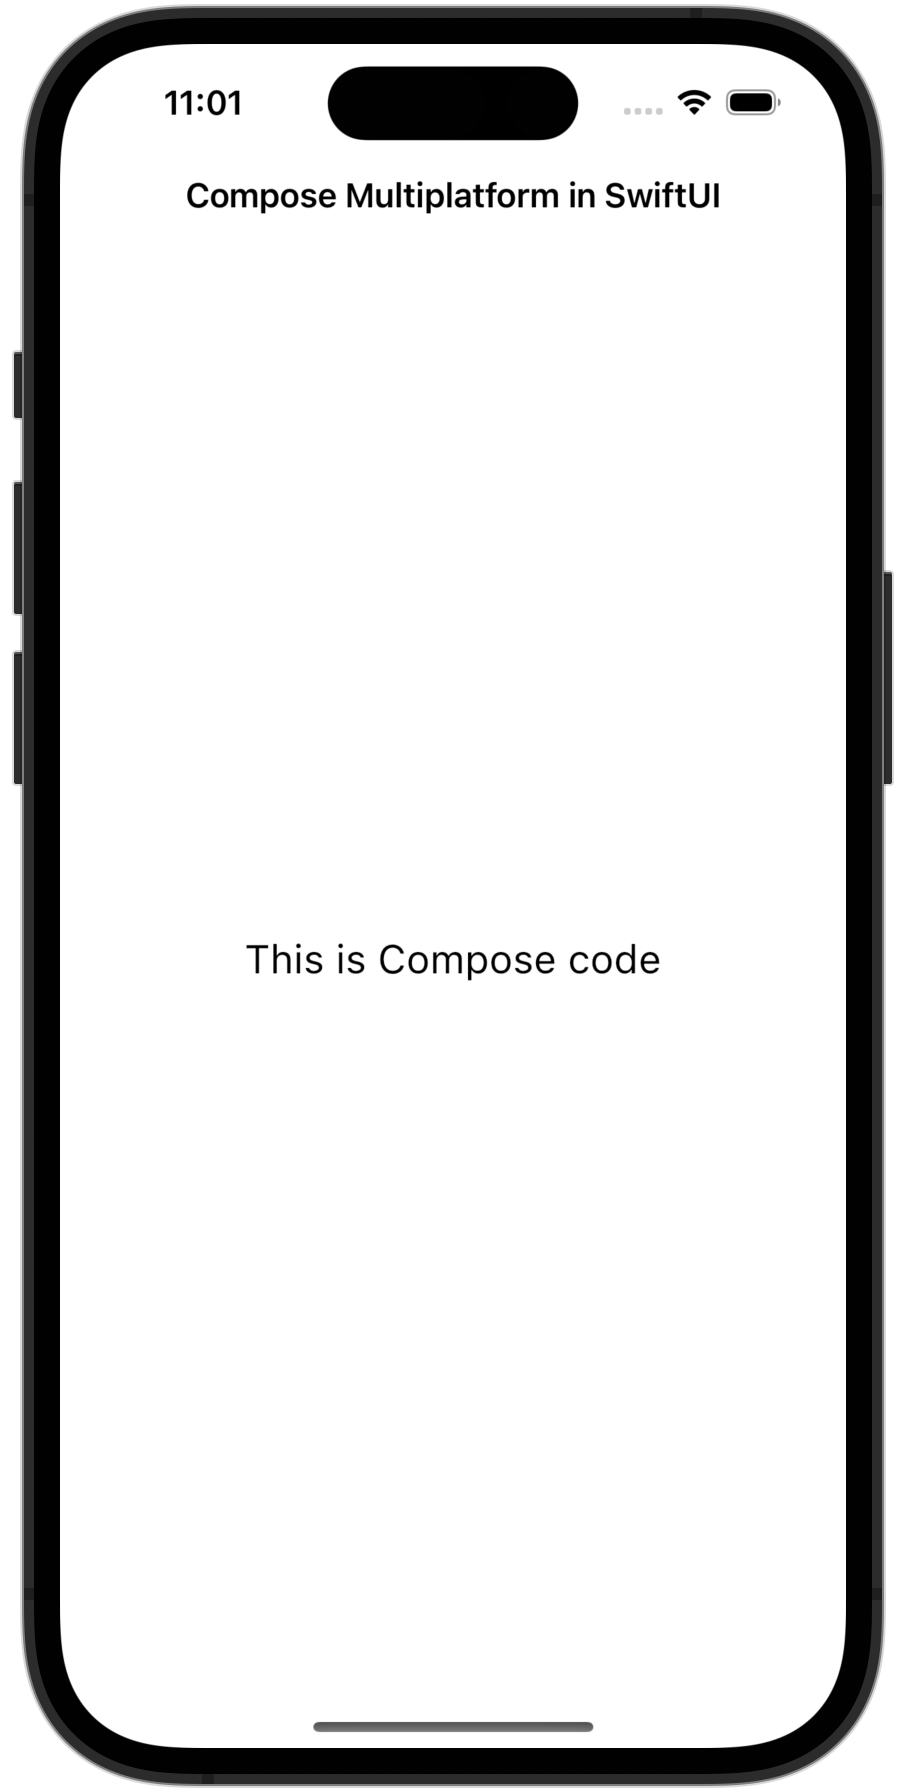
要在 SwiftUI 應用程式中使用 Compose Multiplatform,請建立一個 Kotlin 函式 MainViewController(),它回傳來自 UIKit 的 UIViewController 並包含 Compose Multiplatform 程式碼:
fun MainViewController(): UIViewController =
    ComposeUIViewController {
        Box(Modifier.fillMaxSize(), contentAlignment = Alignment.Center) {
            Text("This is Compose code", fontSize = 20.sp)
        }
    }
ComposeUIViewController() 是一個 Compose Multiplatform 函式庫函式,它接受一個可組合函式作為 content 引數。 以這種方式傳遞的函式可以呼叫其他可組合函式,例如,Text()。
可組合函式是具有
@Composable註解的函式。
接下來,您需要一個在 SwiftUI 中代表 Compose Multiplatform 的結構。 建立以下結構,將 UIViewController 實例轉換為 SwiftUI 檢視:
struct ComposeViewController: UIViewControllerRepresentable {
    func makeUIViewController(context: Context) -> UIViewController {
        return Main_iosKt.MainViewController()
    }

    func updateUIViewController(_ uiViewController: UIViewController, context: Context) {
    }
}
現在您可以在其他 SwiftUI 程式碼中使用 ComposeView 結構。
Main_iosKt.MainViewController 是一個自動產生的名稱。您可以從與 Swift/Objective-C 互通性頁面了解更多關於從 Swift 存取 Kotlin 程式碼的資訊。
最終,您的應用程式應該看起來像這樣:

您可以在任何 SwiftUI 檢視階層中使用此 ComposeView,並從 SwiftUI 程式碼內部控制其大小。
如果您想將 Compose Multiplatform 嵌入到現有應用程式中,請在任何使用 SwiftUI 的地方使用 ComposeView 結構。 範例請參閱我們的範例專案。
在 Compose Multiplatform 中使用 SwiftUI
要在 Compose Multiplatform 中使用 SwiftUI,請將您的 Swift 程式碼新增到一個中介的 UIViewController。 目前,您無法直接在 Kotlin 中編寫 SwiftUI 結構。相反地,您必須在 Swift 中編寫它們並將它們傳遞給 Kotlin 函式。
首先,為您的入口函式新增一個引數以建立 ComposeUIViewController 元件:
@OptIn(ExperimentalForeignApi::class)
fun ComposeEntryPointWithUIViewController(
    createUIViewController: () -> UIViewController
): UIViewController =
    ComposeUIViewController {
        Column(
            Modifier
                .fillMaxSize()
                .windowInsetsPadding(WindowInsets.systemBars),
            horizontalAlignment = Alignment.CenterHorizontally
        ) {
            Text("How to use SwiftUI inside Compose Multiplatform")
            UIKitViewController(
                factory = createUIViewController,
                modifier = Modifier.size(300.dp).border(2.dp, Color.Blue),
            )
        }
    }
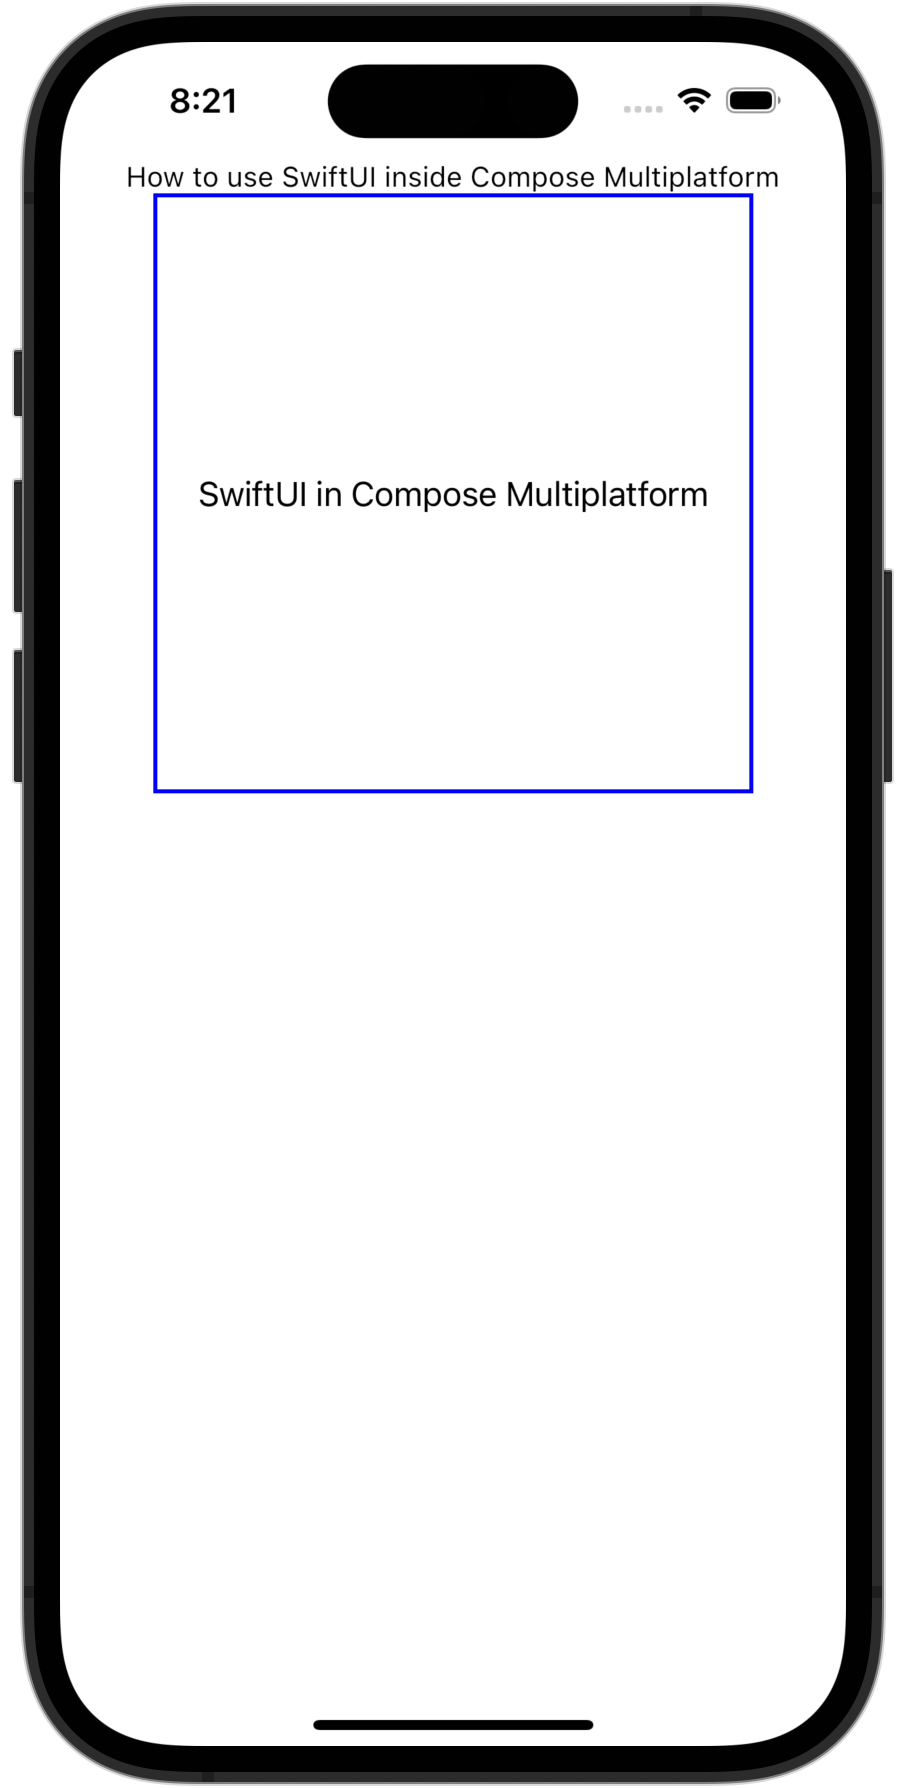
在您的 Swift 程式碼中,將 createUIViewController 傳遞給您的入口函式。 您可以使用 UIHostingController 實例來包裝 SwiftUI 檢視:
Main_iosKt.ComposeEntryPointWithUIViewController(createUIViewController: { () -> UIViewController in
    let swiftUIView = VStack {
        Text("SwiftUI in Compose Multiplatform")
    }
    return UIHostingController(rootView: swiftUIView)
})
最終,您的應用程式應該看起來像這樣:

請在範例專案中探索此範例的程式碼。
地圖檢視
您可以使用 SwiftUI 的 Map 元件在 Compose Multiplatform 中實作地圖檢視。這允許您的應用程式顯示完全互動式的 SwiftUI 地圖。
對於相同的 Kotlin 入口函式,在 Swift 中,使用 UIHostingController 傳遞包裝 Map 檢視的 UIViewController:
import SwiftUI
import MapKit

Main_iosKt.ComposeEntryPointWithUIViewController(createUIViewController: {
    let region = Binding.constant(
        MKCoordinateRegion(
            center: CLLocationCoordinate2D(latitude: 37.7749, longitude: -122.4194),
            span: MKCoordinateSpan(latitudeDelta: 0.05, longitudeDelta: 0.05)
        )
    )

    let mapView = Map(coordinateRegion: region)
    return UIHostingController(rootView: mapView)
})
現在,讓我們看看一個進階範例。此程式碼為 SwiftUI 地圖新增自訂註解,並允許您從 Swift 更新檢視狀態:
import SwiftUI
import MapKit

struct AnnotatedMapView: View {
    // Manages map region state
    @State private var region = MKCoordinateRegion(
        center: CLLocationCoordinate2D(latitude: 51.5074, longitude: -0.1278),
        span: MKCoordinateSpan(latitudeDelta: 0.1, longitudeDelta: 0.1)
    )
    // Displays a map with a custom annotation
    var body: some View {
        Map(coordinateRegion: $region, annotationItems: [Landmark.example]) { landmark in
            MapMarker(coordinate: landmark.coordinate, tint: .blue)
        }
    }
}

struct Landmark: Identifiable {
    let id = UUID()
    let name: String
    let coordinate: CLLocationCoordinate2D

    static let example = Landmark(
        name: "Big Ben",
        coordinate: CLLocationCoordinate2D(latitude: 51.5007, longitude: -0.1246)
    )
}
然後您可以將此帶註解的地圖包裝在 UIHostingController 中,並將其傳遞給您的 Compose Multiplatform 程式碼:
Main_iosKt.ComposeEntryPointWithUIViewController(createUIViewController: {
    return UIHostingController(rootView: AnnotatedMapView())
})
AnnotatedMapView 執行以下任務:
- 定義 SwiftUI
Map檢視並將其嵌入到一個名為AnnotatedMapView的自訂檢視中。 - 使用
@State和MKCoordinateRegion管理地圖定位的內部狀態,讓 Compose Multiplatform 能夠顯示互動式、具狀態感知能力的地圖。 - 使用符合
Identifiable協定的靜態Landmark模型在地圖上顯示MapMarker,這是 SwiftUI 中註解所需的。 - 使用
annotationItems以宣告式方式放置自訂標記在地圖上。 - 將 SwiftUI 元件包裝在
UIHostingController中,然後作為UIViewController傳遞給 Compose Multiplatform。
相機檢視
您可以使用 SwiftUI 和 UIKit 的 UIImagePickerController,並將其包裝在與 SwiftUI 相容的元件中,在 Compose Multiplatform 中實作相機檢視。這允許您的應用程式啟動系統相機並擷取照片。
對於相同的 Kotlin 入口函式,在 Swift 中,定義一個使用 UIImagePickerController 的基本 CameraView,並使用 UIHostingController 嵌入它:
Main_iosKt.ComposeEntryPointWithUIViewController(createUIViewController: {
    return UIHostingController(rootView: CameraView { image in
        // Handle captured image here
    })
})
為使其正常運作,將 CameraView 定義如下:
import SwiftUI
import UIKit

struct CameraView: UIViewControllerRepresentable {
    let imageHandler: (UIImage) -> Void
    @Environment(\.presentationMode) private var presentationMode

    init(imageHandler: @escaping (UIImage) -> Void) {
        self.imageHandler = imageHandler
    }

    func makeCoordinator() -> Coordinator {
        Coordinator(self)
    }

    func makeUIViewController(context: Context) -> UIImagePickerController {
        let picker = UIImagePickerController()
        picker.sourceType = .camera
        picker.delegate = context.coordinator
        return picker
    }

    func updateUIViewController(_ uiViewController: UIImagePickerController, context: Context) {}

    class Coordinator: NSObject, UINavigationControllerDelegate, UIImagePickerControllerDelegate {
        let parent: CameraView

        init(_ parent: CameraView) {
            self.parent = parent
        }

        func imagePickerController(_ picker: UIImagePickerController,
                                   didFinishPickingMediaWithInfo info: [UIImagePickerController.InfoKey : Any]) {
            if let image = info[.originalImage] as? UIImage {
                parent.imageHandler(image)
            }
            parent.presentationMode.wrappedValue.dismiss()
        }

        func imagePickerControllerDidCancel(_ picker: UIImagePickerController) {
            parent.presentationMode.wrappedValue.dismiss()
        }
    }
}
現在,讓我們看看一個進階範例。此程式碼呈現相機檢視並在同一個 SwiftUI 檢視中顯示擷取影像的縮圖:
import SwiftUI
import UIKit

struct CameraPreview: View {
    // Controls the camera sheet visibility
    @State private var showCamera = false
    // Stores the captured image
    @State private var capturedImage: UIImage?

    var body: some View {
        VStack {
            if let image = capturedImage {
                // Displays the captured image
                Image(uiImage: image)
                    .resizable()
                    .scaledToFit()
                    .frame(height: 200)
            } else {
                // Shows placeholder text when no image is captured
                Text("No image captured")
            }

            // Adds a button to open the camera
            Button("Open Camera") {
                showCamera = true
            }
            // Presents CameraView as a modal sheet
            .sheet(isPresented: $showCamera) {
                CameraView { image in
                    capturedImage = image
                }
            }
        }
    }
}
CameraPreview 檢視執行以下任務:
- 當使用者輕點按鈕時,以模態
.sheet方式呈現CameraView。 - 使用
@State屬性包裝器來儲存並顯示擷取的影像。 - 嵌入 SwiftUI 的原生
Image檢視來預覽照片。 - 重複使用與之前相同的基於
UIViewControllerRepresentable的CameraView,但將其更深入地整合到 SwiftUI 狀態系統中。
要在真實裝置上測試,您需要將
NSCameraUsageDescription鍵新增到您應用程式的Info.plist檔案中。 如果沒有它,應用程式在執行時將會當機。
網頁檢視
您可以使用 SwiftUI,透過使用 UIViewRepresentable 包裝 UIKit 的 WKWebView 元件,在 Compose Multiplatform 中實作網頁檢視。這允許您顯示嵌入式網頁內容並提供完整的原生渲染。
對於相同的 Kotlin 入口函式,在 Swift 中,定義一個使用 UIHostingController 嵌入的基本 WebView:
Main_iosKt.ComposeEntryPointWithUIViewController(createUIViewController: {
    let url = URL(string: "https://www.jetbrains.com")!
    return UIHostingController(rootView: WebView(url: url))
})
現在,讓我們看看一個進階範例。此程式碼為網頁檢視新增導覽追蹤和載入狀態顯示:
import SwiftUI
import UIKit
import WebKit

struct AdvancedWebView: UIViewRepresentable {
    let url: URL
    @Binding var isLoading: Bool
    @Binding var currentURL: String

    // Creates WKWebView with navigation delegate
    func makeUIView(context: Context) -> WKWebView {
        let webView = WKWebView()
        webView.navigationDelegate = context.coordinator
        webView.load(URLRequest(url: url))
        return webView
    }

    func updateUIView(_ uiView: WKWebView, context: Context) {}

    // Creates coordinator to handle web navigation events
    func makeCoordinator() -> Coordinator {
        Coordinator(isLoading: $isLoading, currentURL: $currentURL)
    }

    class Coordinator: NSObject, WKNavigationDelegate {
        @Binding var isLoading: Bool
        @Binding var currentURL: String

        init(isLoading: Binding<Bool>, currentURL: Binding<String>) {
            _isLoading = isLoading
            _currentURL = currentURL
        }

        func webView(_ webView: WKWebView, didStartProvisionalNavigation navigation: WKNavigation?) {
            isLoading = true
        }

        // Updates URL and indicates loading has completed
        func webView(_ webView: WKWebView, didFinish navigation: WKNavigation?) {
            isLoading = false
            currentURL = webView.url?.absoluteString ?? ""
        }
    }
}
在 SwiftUI 檢視中依以下方式使用它:
struct WebViewContainer: View {
    // Tracks loading state of web view
    @State private var isLoading = false
    // Tracks current URL displayed
    @State private var currentURL = ""

    var body: some View {
        VStack {
            // Displays loading indicator while loading
            if isLoading {
                ProgressView()
            }
            // Shows current URL
            Text("URL: \(currentURL)")
                .font(.caption)
                .lineLimit(1)
                .truncationMode(.middle)

            // Embeds the advanced web view
            AdvancedWebView(
                url: URL(string: "https://www.jetbrains.com")!,
                isLoading: $isLoading,
                currentURL: $currentURL
            )
        }
    }
}
AdvancedWebView 和 WebViewContainer 執行以下任務:
- 建立一個
WKWebView,並帶有自訂導覽代理,以追蹤載入進度與 URL 變更。 - 使用 SwiftUI 的
@State繫結來動態更新 UI 以回應導覽事件。 - 當頁面正在載入時,顯示
ProgressView旋轉指示器。 - 使用
Text元件在檢視頂部顯示目前 URL。 - 使用
UIHostingController將此元件整合到您的 Compose UI 中。
下一步
您還可以探索 Compose Multiplatform 與 UIKit 框架整合的方式。
