콘솔 앱 만들기 – 튜토리얼
이 튜토리얼에서는 IntelliJ IDEA를 사용하여 콘솔 애플리케이션을 만드는 방법을 설명합니다.
시작하려면 먼저 최신 버전의 IntelliJ IDEA를 다운로드하여 설치하세요.
프로젝트 생성
IntelliJ IDEA에서 File | New | Project를 선택합니다.
왼쪽 리스트에서 Kotlin을 선택합니다.
새 프로젝트의 이름을 입력하고 필요한 경우 위치를 변경합니다.
Create Git repository 체크박스를 선택하면 새 프로젝트를 버전 관리 시스템(VCS)으로 관리할 수 있습니다. 이 작업은 나중에 언제든지 수행할 수 있습니다.
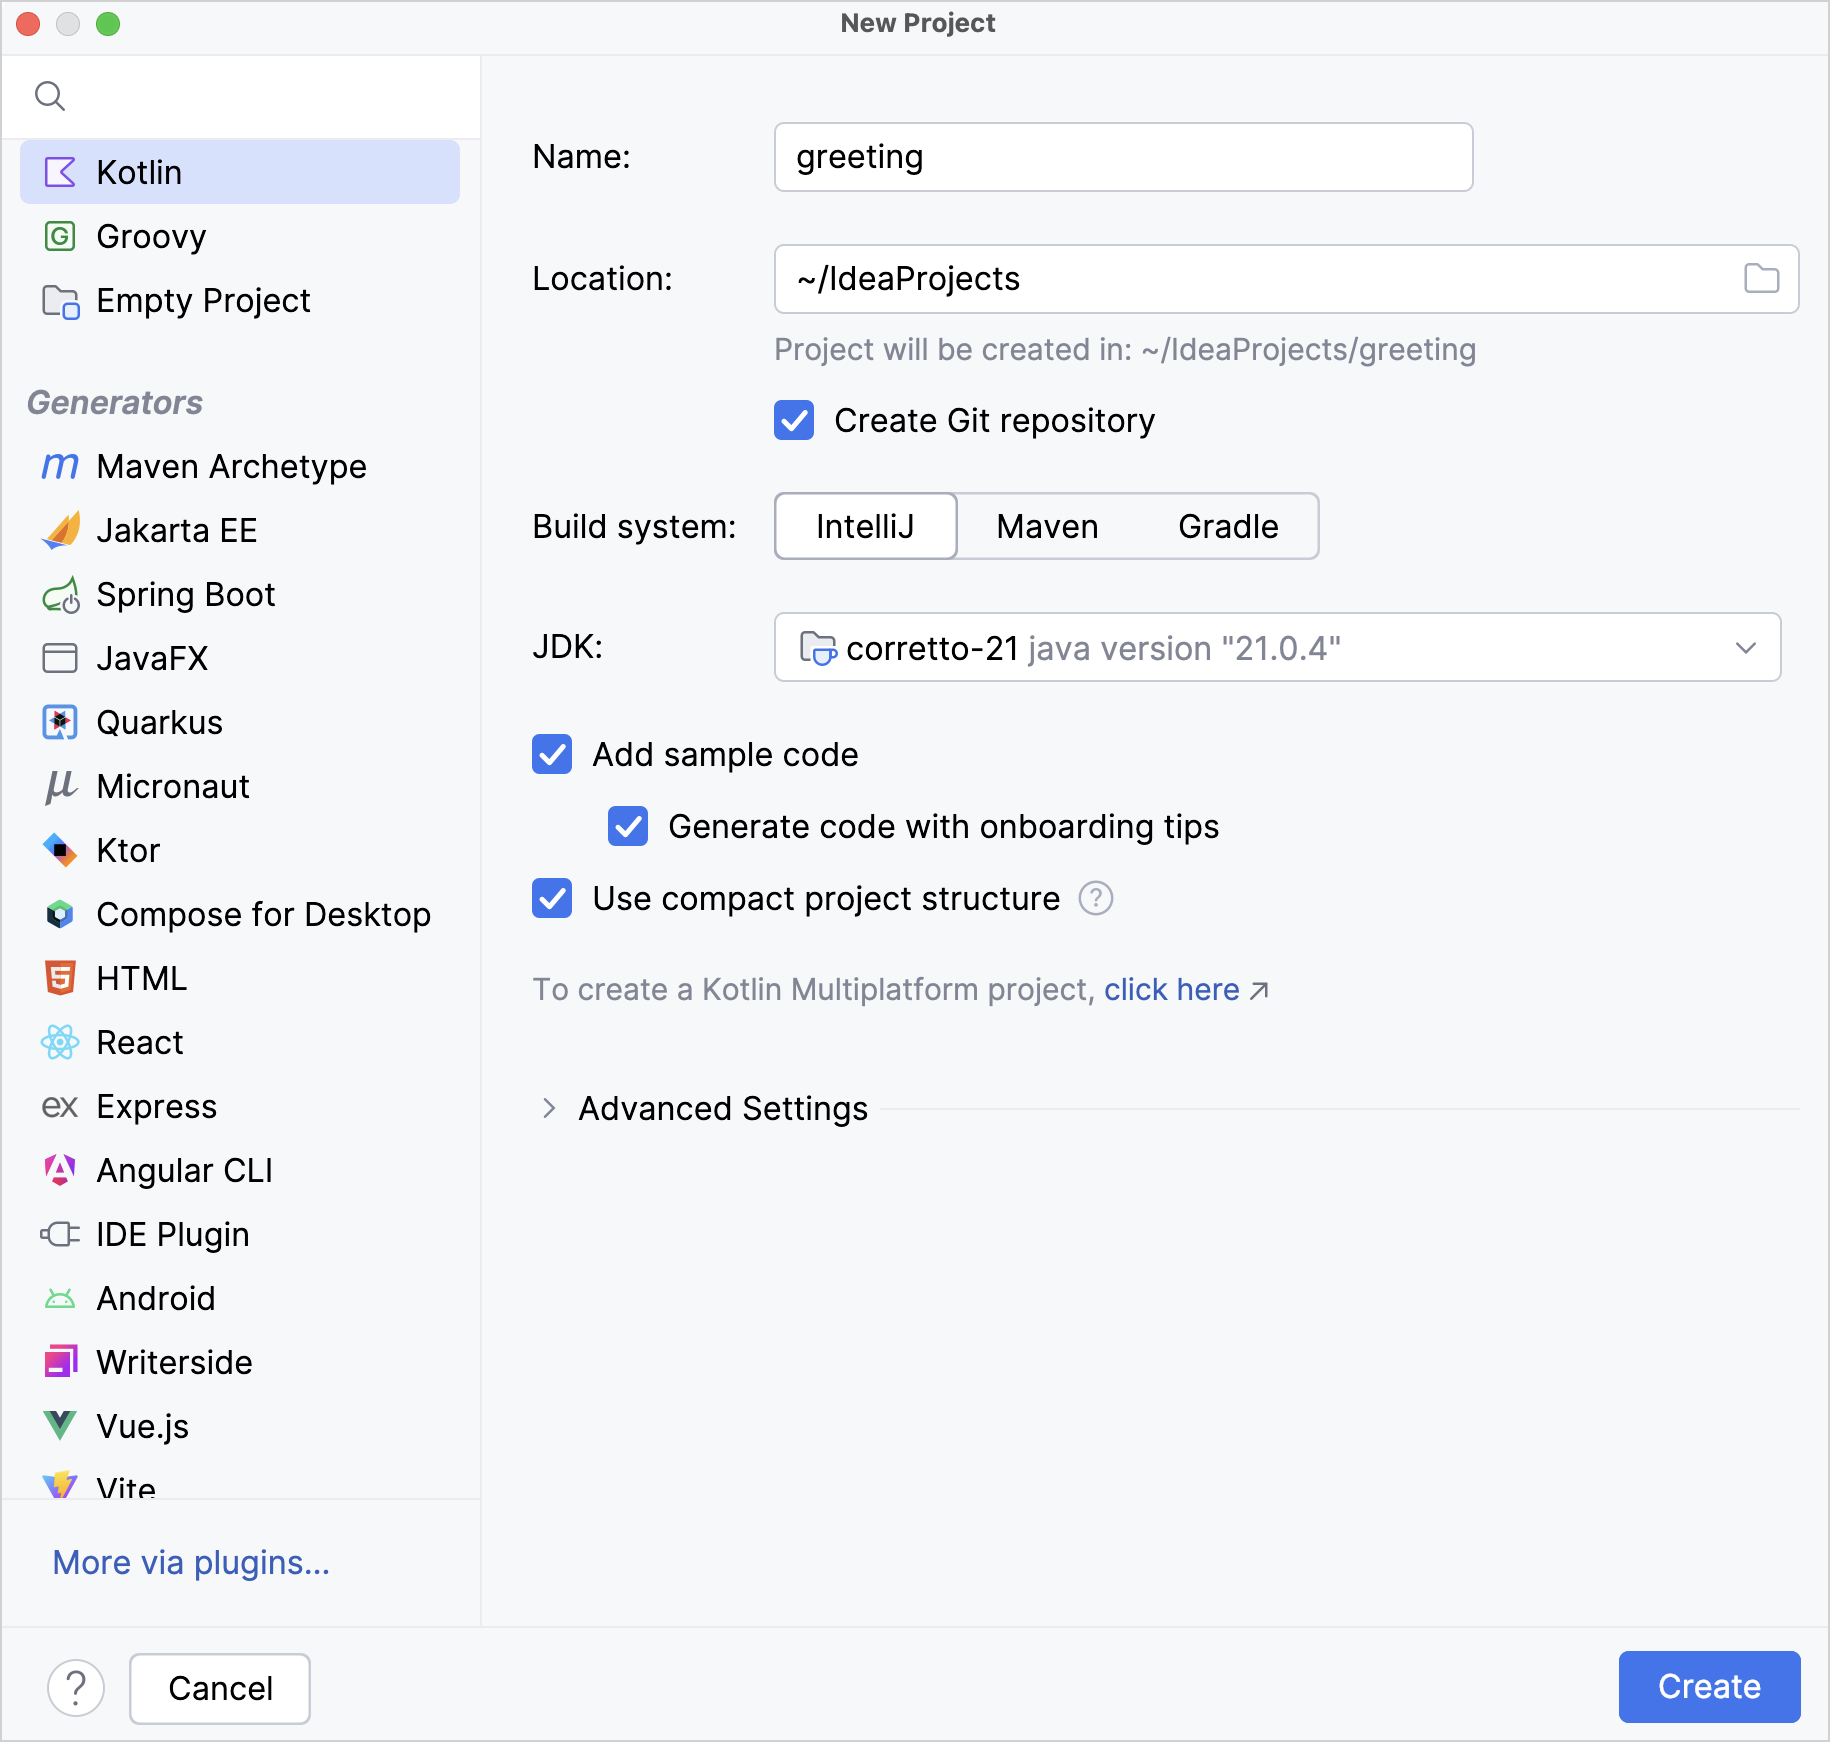
IntelliJ 빌드 시스템을 선택합니다. 이는 추가 아티팩트(artifact)를 다운로드할 필요가 없는 네이티브 빌더입니다.
추가 설정이 필요한 더 복잡한 프로젝트를 만들려면 Maven 또는 Gradle을 선택하세요. Gradle의 경우 빌드 스크립트 언어로 Kotlin 또는 Groovy 중 하나를 선택합니다.
JDK 리스트에서 프로젝트에 사용할 JDK를 선택합니다.
- 컴퓨터에 JDK가 설치되어 있지만 IDE에 정의되어 있지 않은 경우, Add JDK를 선택하고 JDK 홈 디렉터리 경로를 지정하세요.
- 필요한 JDK가 컴퓨터에 없는 경우, Download JDK를 선택하세요.
Add sample code 옵션을 활성화하여 샘플
"Hello World!"애플리케이션이 포함된 파일을 생성합니다.Generate code with onboarding tips 옵션을 활성화하여 샘플 코드에 유용한 주석을 추가할 수도 있습니다.
Create를 클릭합니다.
Gradle 빌드 시스템을 선택한 경우, 프로젝트에
build.gradle(.kts)빌드 스크립트 파일이 생성됩니다. 여기에는 콘솔 애플리케이션에 필요한kotlin("jvm")플러그인과 의존성이 포함됩니다. 최신 버전의 플러그인을 사용하고 있는지 확인하세요.kotlinplugins { kotlin("jvm") version "2.4.0" application }groovyplugins { id 'org.jetbrains.kotlin.jvm' version '2.4.0' id 'application' }
애플리케이션 작성
src/main/kotlin폴더의Main.kt파일을 엽니다.src디렉터리에는 Kotlin 소스 파일과 리소스가 들어 있습니다.Main.kt파일에는Hello, Kotlin!및 반복문 이터레이터 값을 여러 줄 출력하는 샘플 코드가 포함되어 있습니다.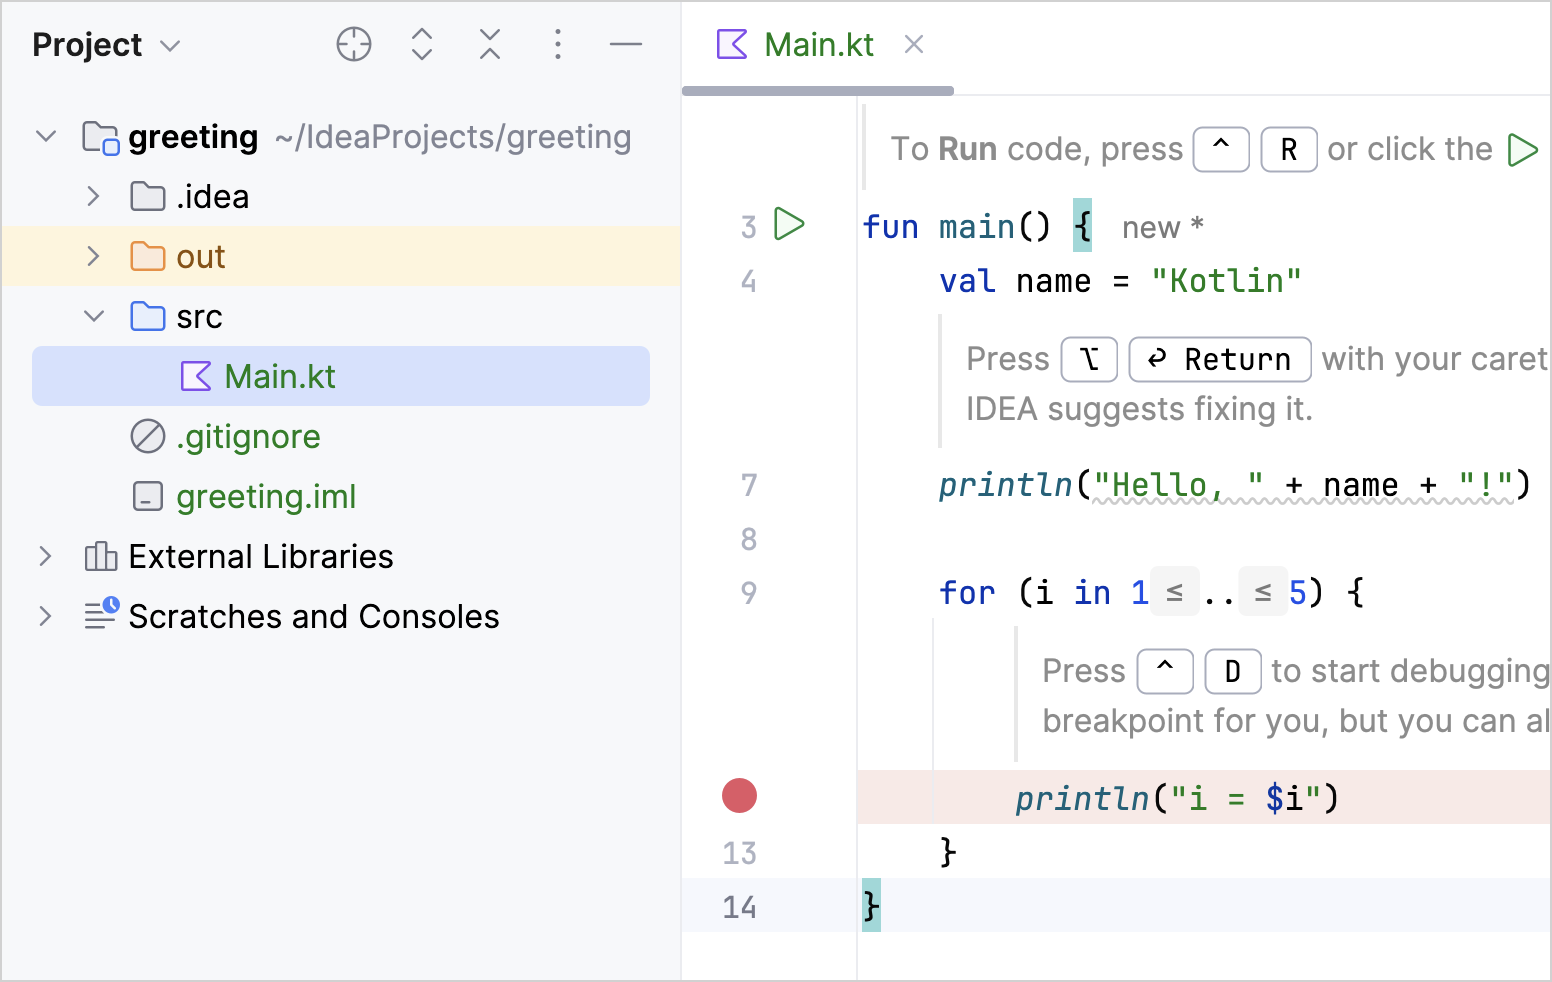
이름을 묻고 사용자에게
Hello라고 인사하도록 코드를 수정합니다.- 입력 프롬프트를 만들고
readln()함수가 반환한 값을name변수에 할당합니다. - 문자열 연결 대신 문자열 템플릿(string template)을 사용해 보겠습니다. 다음과 같이 텍스트 출력 시 변수 이름 앞에 달러 기호($)를 직접 추가하면 됩니다:
$name.
kotlinfun main() { println("What's your name?") val name = readln() println("Hello, $name!") // ... }- 입력 프롬프트를 만들고
애플리케이션 실행
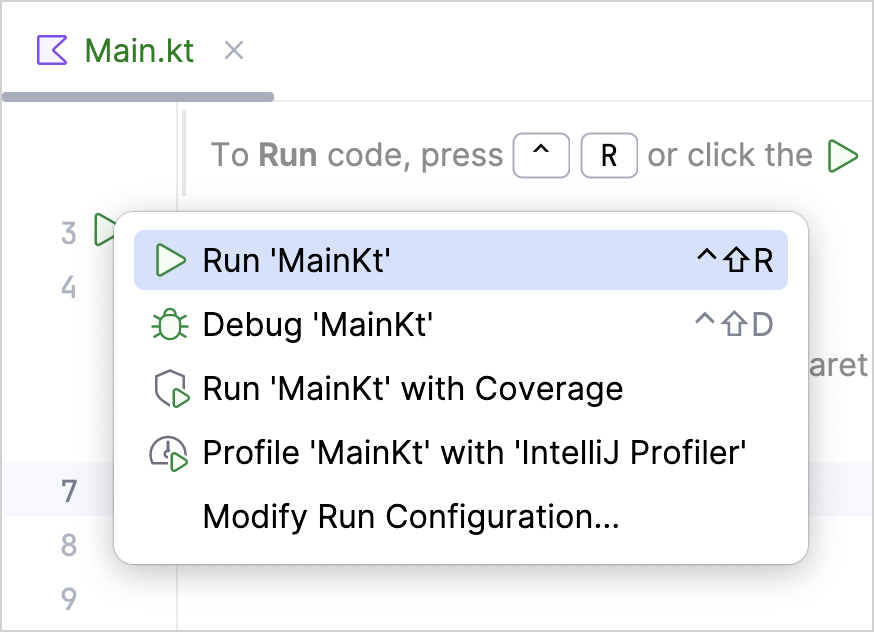
이제 애플리케이션을 실행할 준비가 되었습니다. 가장 쉬운 방법은 거터(gutter)에 있는 녹색 Run 아이콘을 클릭하고 Run 'MainKt'를 선택하는 것입니다.
Run 도구 창에서 결과를 확인할 수 있습니다.

이름을 입력하고 애플리케이션의 인사를 받아보세요!
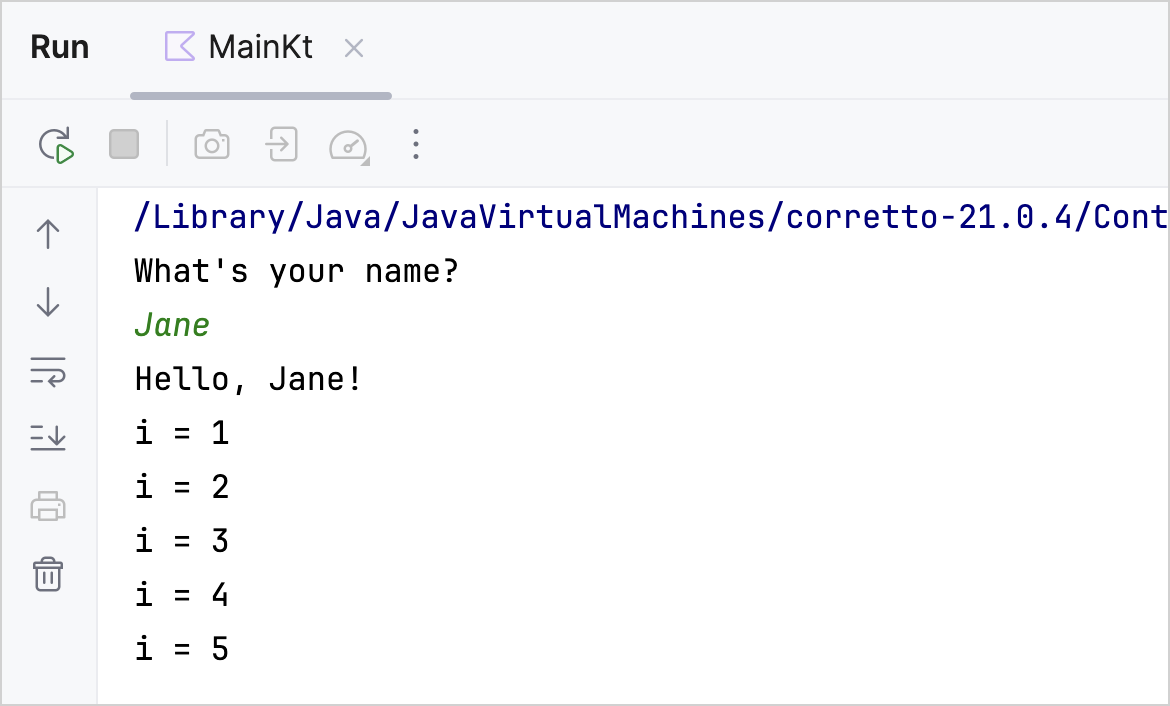
축하합니다! 첫 번째 Kotlin 애플리케이션을 성공적으로 실행했습니다.
다음 단계
애플리케이션을 만들어 보았으니 이제 Kotlin 문법을 더 깊이 있게 살펴볼 수 있습니다.
- Kotlin 투어 살펴보기
- IntelliJ IDEA용 JetBrains Academy 플러그인을 설치하고 Kotlin Koans 코스의 연습 문제를 풀어보세요.