Spring Boot 프로젝트에 데이터베이스 지원 추가
이 문서는 Spring Boot와 Kotlin 시작하기 자습서의 세 번째 파트입니다. 계속 진행하기 전에 이전 단계들을 완료했는지 확인하세요.
![]() Kotlin으로 Spring Boot 프로젝트 생성
Kotlin으로 Spring Boot 프로젝트 생성![]() Spring Boot 프로젝트에 데이터 클래스 추가
Spring Boot 프로젝트에 데이터 클래스 추가![]() Spring Boot 프로젝트에 데이터베이스 지원 추가
Spring Boot 프로젝트에 데이터베이스 지원 추가![]() 데이터베이스 액세스를 위해 Spring Data CrudRepository 사용
데이터베이스 액세스를 위해 Spring Data CrudRepository 사용
이 자습서 파트에서는 Java Database Connectivity(JDBC)를 사용하여 프로젝트에 데이터베이스를 추가하고 구성합니다. JVM 애플리케이션에서는 JDBC를 사용하여 데이터베이스와 상호 작용합니다. 편의를 위해 Spring 프레임워크는 JDBC 사용을 단순화하고 일반적인 오류를 방지하는 데 도움이 되는 JdbcTemplate 클래스를 제공합니다.
데이터베이스 지원 추가
Spring 프레임워크 기반 애플리케이션의 일반적인 관행은 소위 서비스(service) 계층 내에 데이터베이스 액세스 로직을 구현하는 것입니다. 이곳은 비즈니스 로직이 위치하는 곳입니다. Spring에서는 해당 클래스가 애플리케이션의 서비스 계층에 속함을 암시하기 위해 클래스에 @Service 어노테이션을 표시해야 합니다. 이 애플리케이션에서는 이 목적으로 MessageService 클래스를 생성합니다.
동일한 패키지에 다음과 같이 MessageService.kt 파일과 MessageService 클래스를 생성합니다.
// MessageService.kt
package com.example.demo

import org.springframework.stereotype.Service
import org.springframework.jdbc.core.JdbcTemplate

@Service
class MessageService(private val db: JdbcTemplate) {
    fun findMessages(): List<Message> = db.query("select * from messages") { response, _ ->
        Message(response.getString("id"), response.getString("text"))
    }

    fun save(message: Message): Message {
        db.update(
            "insert into messages values ( ?, ? )",
            message.id, message.text
        )
        return message
    }
}
생성자 인자 및 의존성 주입 – (private val db: JdbcTemplate)
Kotlin의 클래스는 주 생성자(primary constructor)를 가집니다. 또한 하나 이상의 부 생성자(secondary constructors)를 가질 수도 있습니다. 주 생성자는 클래스 헤더의 일부이며, 클래스 이름과 선택적인 타입 파라미터 뒤에 옵니다. 이 경우 생성자는 (val db: JdbcTemplate)입니다.
val db: JdbcTemplate은 생성자의 인자입니다.
후행 람다 및 SAM 변환
findMessages() 함수는 JdbcTemplate 클래스의 query() 함수를 호출합니다. query() 함수는 두 개의 인자를 받습니다. 하나는 String 인스턴스인 SQL 쿼리이고, 다른 하나는 행당 하나의 객체를 매핑할 콜백입니다.
RowMapper 인터페이스는 단 하나의 메서드만 선언하므로, 인터페이스 이름을 생략하고 람다 식을 통해 구현할 수 있습니다. Kotlin 컴파일러는 함수 호출의 파라미터로 사용되므로 람다 식이 변환되어야 하는 인터페이스를 알고 있습니다. 이를 Kotlin의 SAM 변환(SAM conversion)이라고 합니다.
SAM 변환 후, query 함수는 첫 번째 위치에 String, 마지막 위치에 람다 식이라는 두 개의 인자를 갖게 됩니다. Kotlin 컨벤션에 따라 함수의 마지막 파라미터가 함수인 경우, 해당 인자로 전달되는 람다 식을 괄호 밖에 배치할 수 있습니다. 이러한 구문은 후행 람다(trailing lambda)라고도 합니다.
사용하지 않는 람다 인자에 대한 언더스코어
파라미터가 여러 개인 람다의 경우, 사용하지 않는 파라미터의 이름을 대체하기 위해 언더스코어 _ 문자를 사용할 수 있습니다.
따라서 query 함수 호출의 최종 구문은 다음과 같습니다.
MessageController 클래스 업데이트
새로운 MessageService 클래스를 사용하도록 MessageController.kt를 업데이트합니다.
// MessageController.kt
package com.example.demo

import org.springframework.http.ResponseEntity
import org.springframework.web.bind.annotation.GetMapping
import org.springframework.web.bind.annotation.PostMapping
import org.springframework.web.bind.annotation.RequestBody
import org.springframework.web.bind.annotation.RequestMapping
import org.springframework.web.bind.annotation.RestController
import java.net.URI

@RestController
@RequestMapping("/")
class MessageController(private val service: MessageService) {
    @GetMapping
    fun listMessages() = service.findMessages()

    @PostMapping
    fun post(@RequestBody message: Message): ResponseEntity<Message> {
        val savedMessage = service.save(message)
        return ResponseEntity.created(URI("/${savedMessage.id}")).body(savedMessage)
    }
}
@PostMapping 어노테이션
HTTP POST 요청 처리를 담당하는 메서드에는 @PostMapping 어노테이션을 붙여야 합니다. HTTP Body 콘텐츠로 전송된 JSON을 객체로 변환할 수 있도록 메서드 인자에 @RequestBody 어노테이션을 사용해야 합니다. 애플리케이션의 클래스패스에 Jackson 라이브러리가 포함되어 있으므로 변환은 자동으로 이루어집니다.
ResponseEntity
ResponseEntity는 상태 코드, 헤더, 바디를 포함한 전체 HTTP 응답을 나타냅니다.
created() 메서드를 사용하면 응답 상태 코드(201)를 설정하고 생성된 리소스의 컨텍스트 경로를 나타내는 위치(location) 헤더를 설정할 수 있습니다.
MessageService 클래스 업데이트
Message 클래스의 id는 널이 가능한 String으로 선언되었습니다.
data class Message(val id: String?, val text: String)하지만 데이터베이스에 id 값으로 null을 저장하는 것은 올바르지 않습니다. 이 상황을 적절히 처리해야 합니다.
데이터베이스에 메시지를 저장할 때 id가 null이면 새 값을 생성하도록 MessageService.kt 파일의 코드를 업데이트합니다.
// MessageService.kt
package com.example.demo

import org.springframework.stereotype.Service
import org.springframework.jdbc.core.JdbcTemplate
import java.util.UUID

@Service
class MessageService(private val db: JdbcTemplate) {
    fun findMessages(): List<Message> = db.query("select * from messages") { response, _ ->
        Message(response.getString("id"), response.getString("text"))
    }

    fun save(message: Message): Message {
        val id = message.id ?: UUID.randomUUID().toString() // id가 null이면 새 id 생성
        db.update(
            "insert into messages values ( ?, ? )",
            id, message.text
        )
        return message.copy(id = id) // 새 id를 가진 메시지의 복사본 반환
    }
}
엘비스 연산자 – ?:
message.id ?: UUID.randomUUID().toString() 코드는 엘비스 연산자(if-not-null-else 축약형) ?:를 사용합니다. ?:의 왼쪽 식이 null이 아니면 엘비스 연산자는 그것을 반환하고, 그렇지 않으면 오른쪽 식을 반환합니다. 오른쪽 식은 왼쪽 식이 null인 경우에만 평가된다는 점에 유의하세요.
애플리케이션 코드가 데이터베이스와 연동될 준비가 되었습니다. 이제 데이터 소스를 구성해야 합니다.
데이터베이스 구성
애플리케이션에서 데이터베이스를 구성합니다.
src/main/resources디렉토리에schema.sql파일을 생성합니다. 이곳에 데이터베이스 객체 정의를 저장합니다.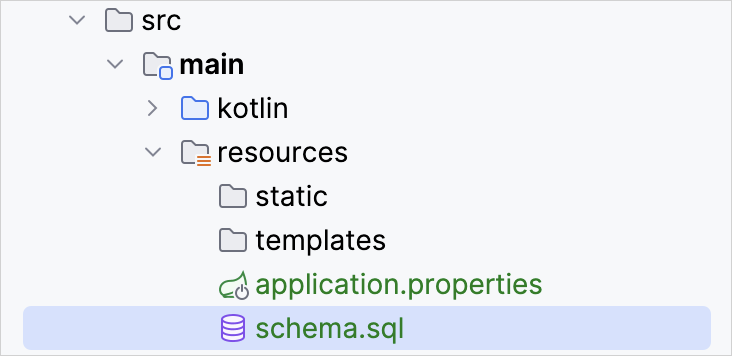
src/main/resources/schema.sql파일을 다음 코드로 업데이트합니다.sql-- schema.sql CREATE TABLE IF NOT EXISTS messages ( id VARCHAR(60) PRIMARY KEY, text VARCHAR NOT NULL );이는
id와text라는 두 개의 컬럼을 가진messages테이블을 생성합니다. 테이블 구조는Message클래스의 구조와 일치합니다.src/main/resources폴더에 있는application.properties파일을 열고 다음 애플리케이션 속성들을 추가합니다.nonespring.application.name=demo spring.datasource.driver-class-name=org.h2.Driver spring.datasource.url=jdbc:h2:file:./data/testdb spring.datasource.username=name spring.datasource.password=password spring.sql.init.schema-locations=classpath:schema.sql spring.sql.init.mode=always이 설정들은 Spring Boot 애플리케이션에서 데이터베이스를 활성화합니다. 공통 애플리케이션 속성의 전체 목록은 Spring 문서를 참조하세요.
HTTP 요청을 통해 데이터베이스에 메시지 추가
이전에 생성한 엔드포인트와 작업하려면 HTTP 클라이언트를 사용해야 합니다. IntelliJ IDEA에서는 내장된 HTTP 클라이언트를 사용하세요.
애플리케이션을 실행합니다. 애플리케이션이 가동되면 POST 요청을 실행하여 메시지를 데이터베이스에 저장할 수 있습니다.
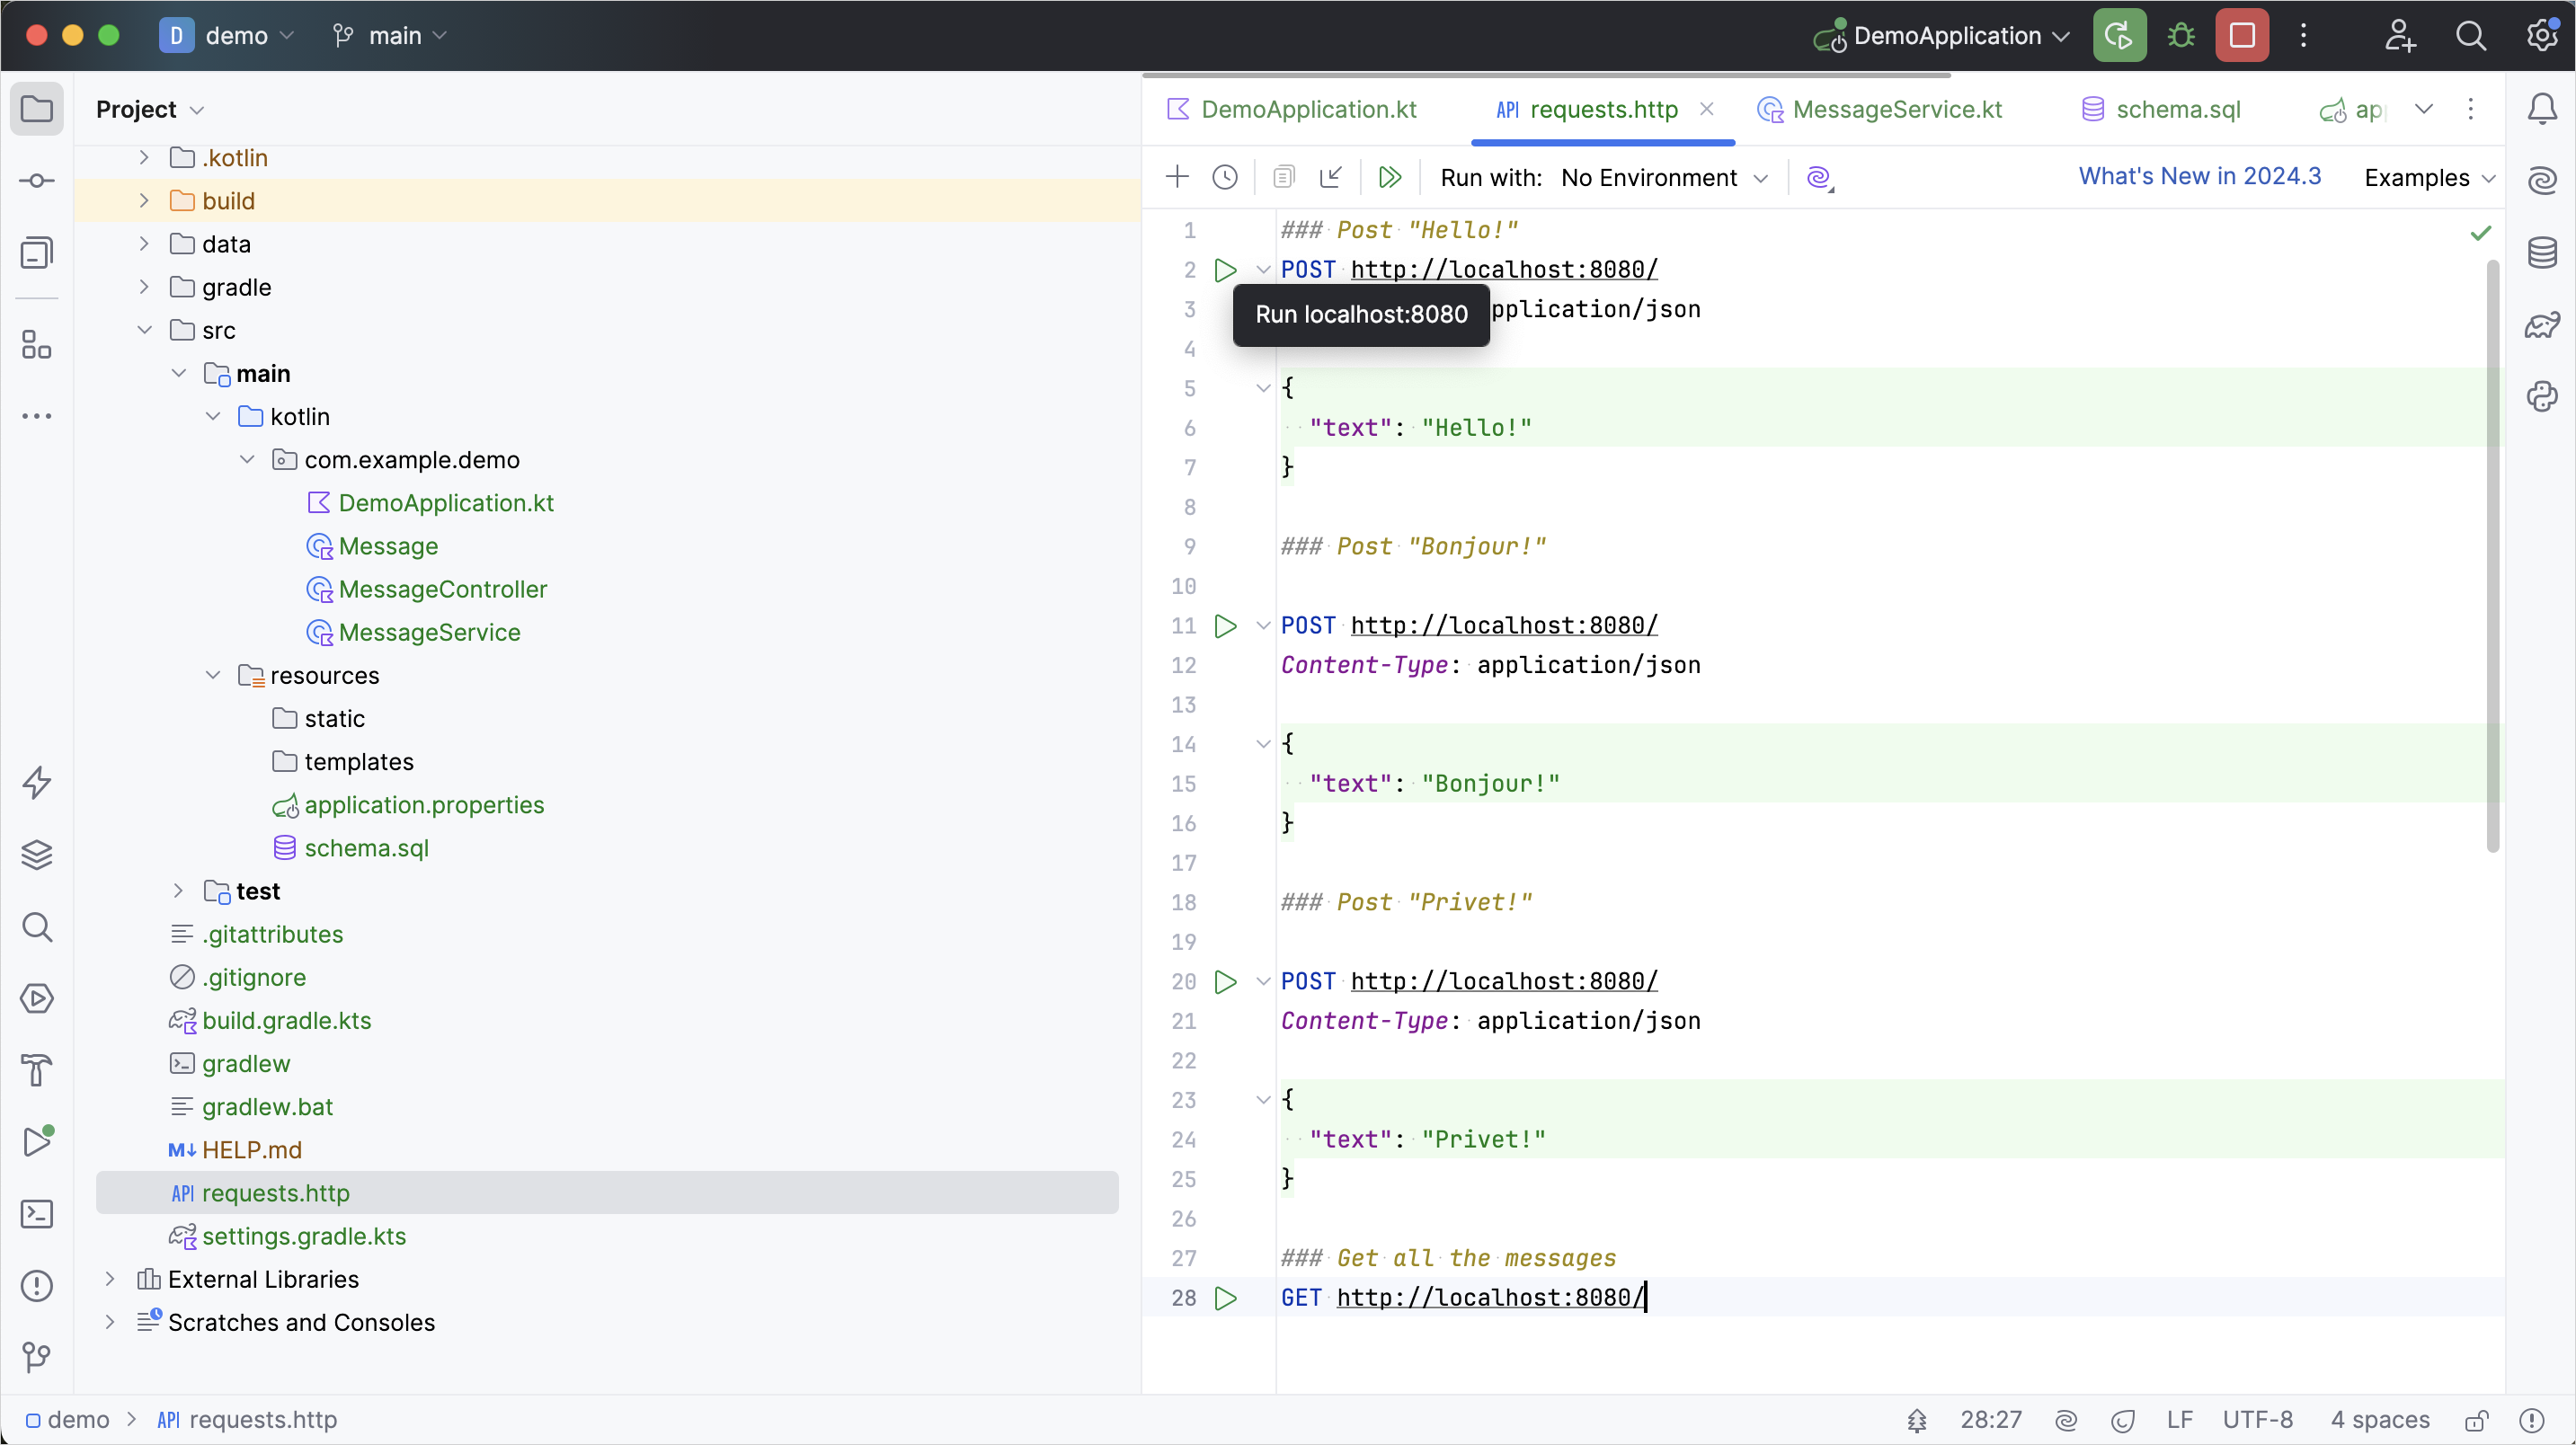
프로젝트 루트 폴더에
requests.http파일을 생성하고 다음 HTTP 요청들을 추가합니다.http### "Hello!" 게시 POST http://localhost:8080/ Content-Type: application/json { "text": "Hello!" } ### "Bonjour!" 게시 POST http://localhost:8080/ Content-Type: application/json { "text": "Bonjour!" } ### "Privet!" 게시 POST http://localhost:8080/ Content-Type: application/json { "text": "Privet!" } ### 모든 메시지 가져오기 GET http://localhost:8080/모든 POST 요청을 실행합니다. 요청 선언 옆의 거터(gutter)에 있는 녹색 Run 아이콘을 사용하세요. 이 요청들은 텍스트 메시지를 데이터베이스에 기록합니다.
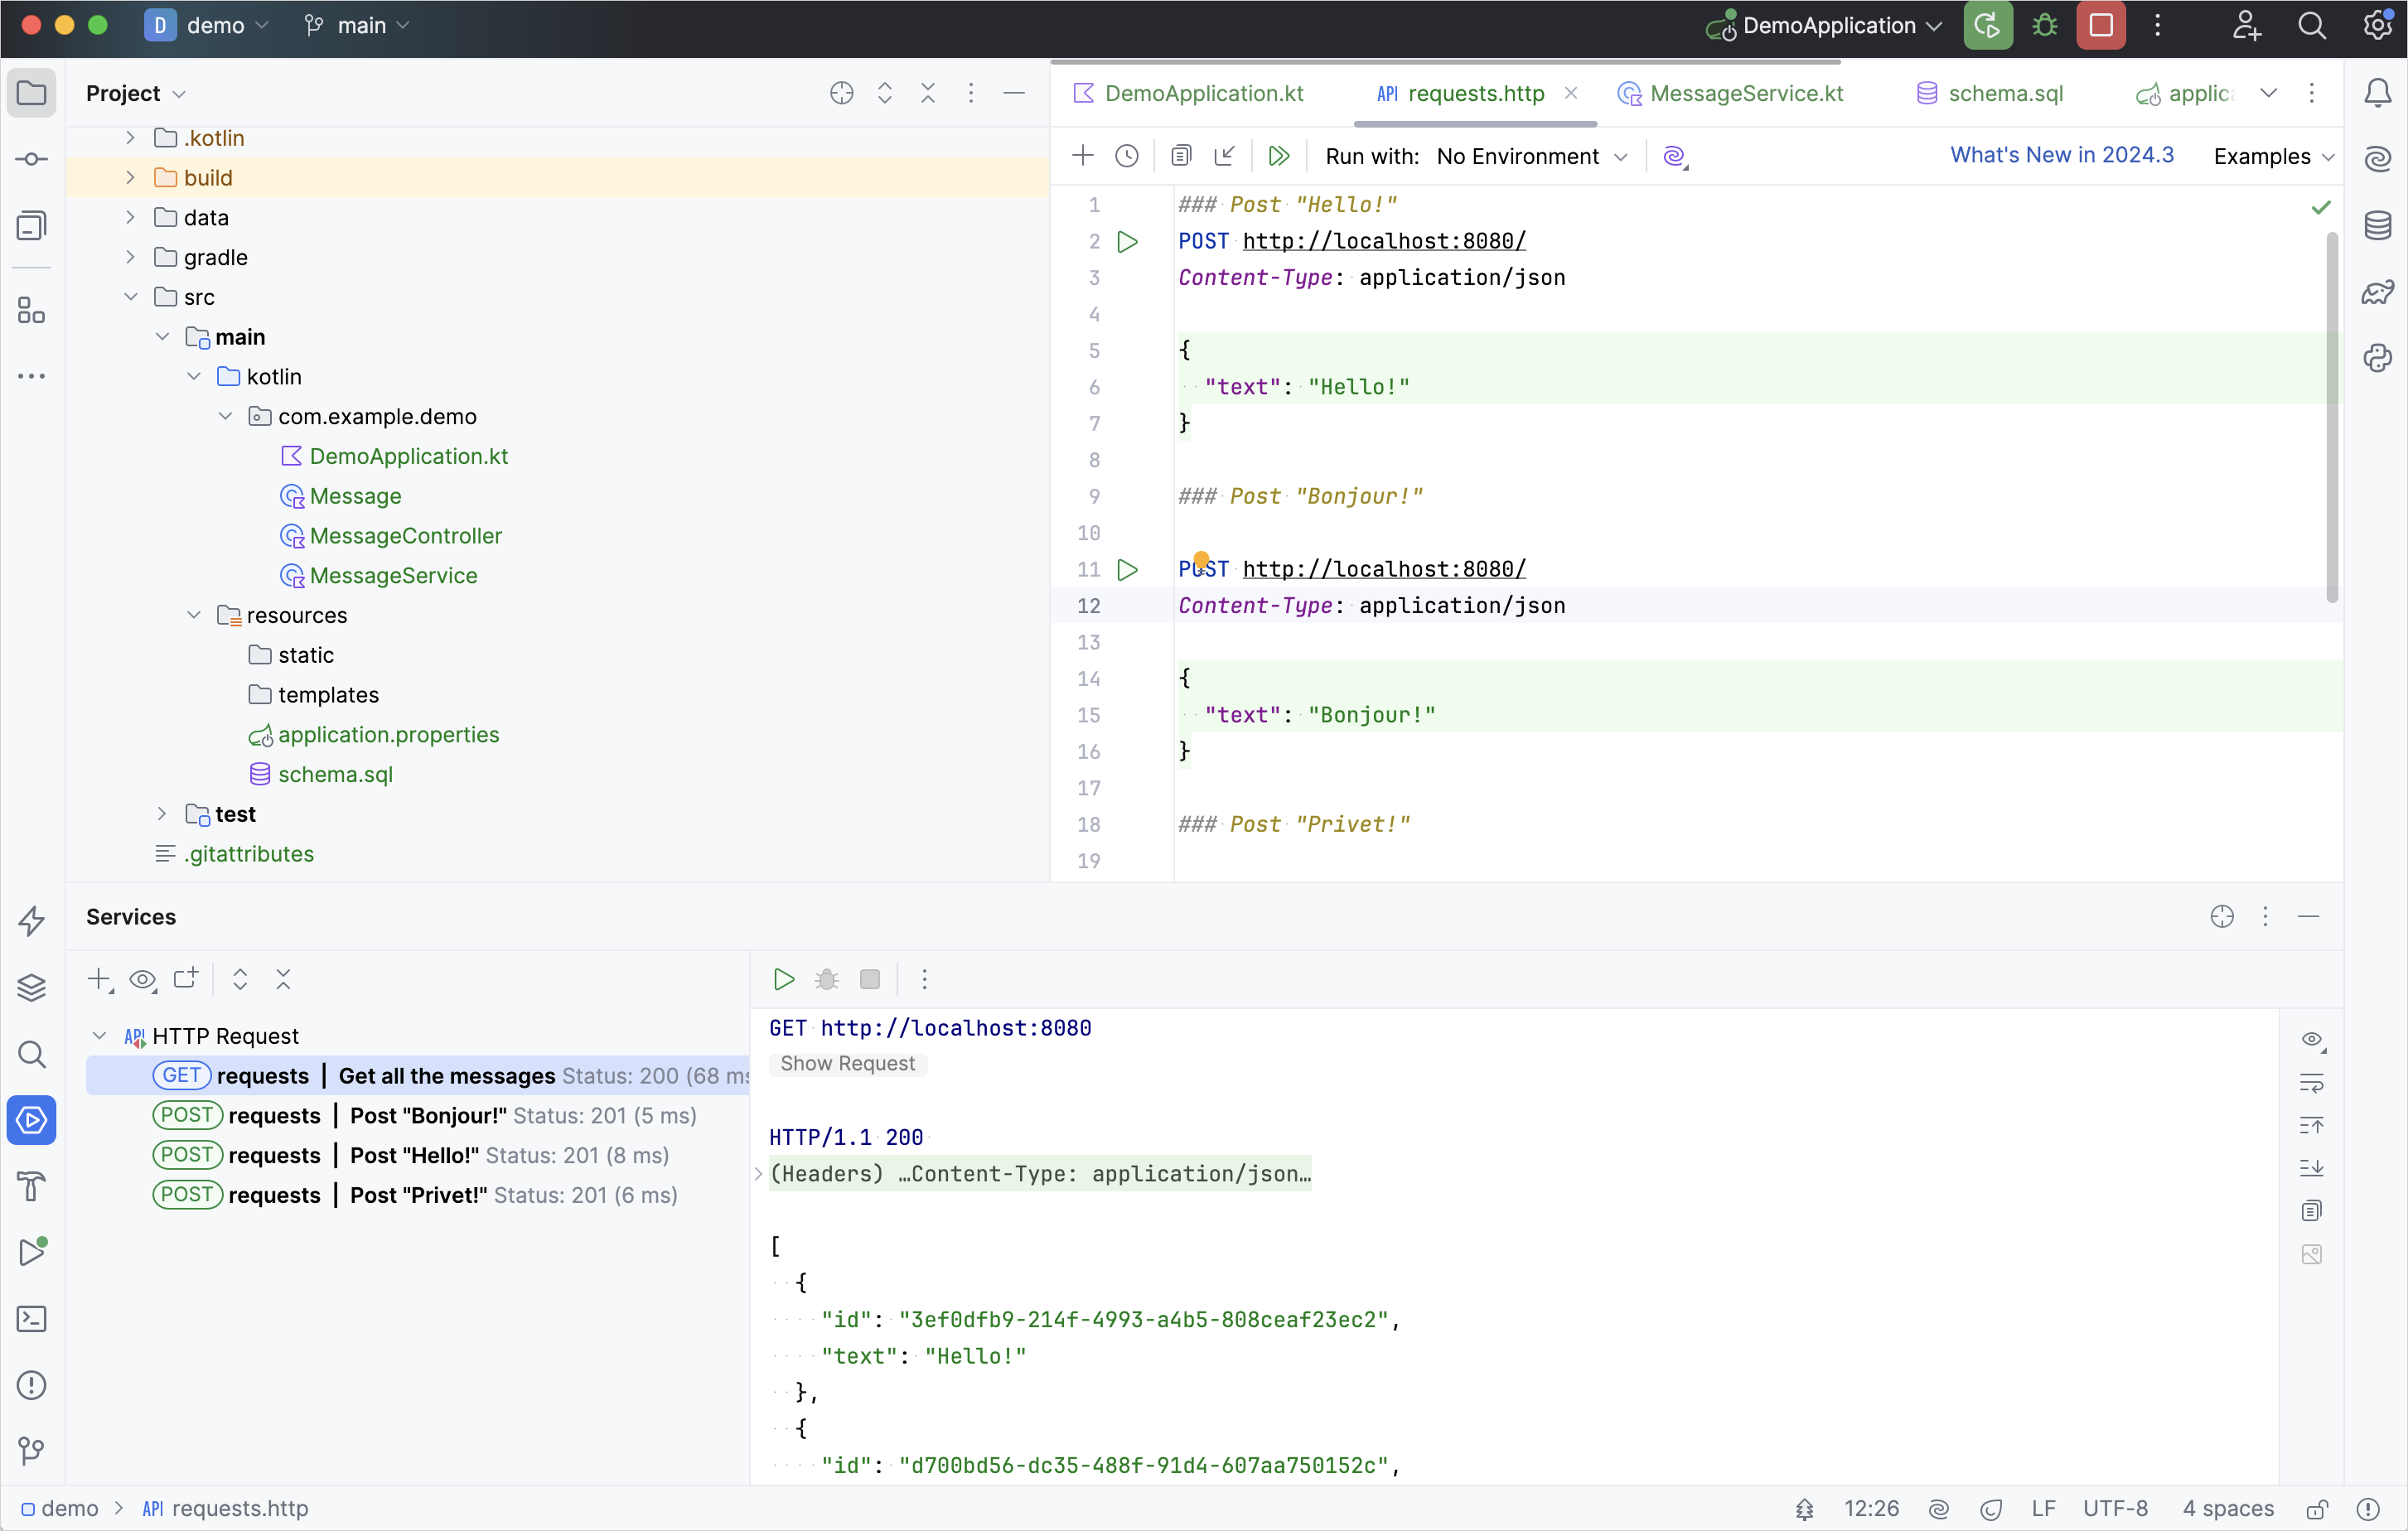
GET 요청을 실행하고 Run 도구 창에서 결과를 확인합니다.
요청을 실행하는 대안적인 방법
다른 HTTP 클라이언트나 cURL 명령줄 도구를 사용할 수도 있습니다. 예를 들어, 터미널에서 다음 명령을 실행하여 동일한 결과를 얻을 수 있습니다.
curl -X POST --location "http://localhost:8080" -H "Content-Type: application/json" -d "{ \"text\": \"Hello!\" }"

curl -X POST --location "http://localhost:8080" -H "Content-Type: application/json" -d "{ \"text\": \"Bonjour!\" }"

curl -X POST --location "http://localhost:8080" -H "Content-Type: application/json" -d "{ \"text\": \"Privet!\" }"

curl -X GET --location "http://localhost:8080"
ID로 메시지 조회
ID별로 개별 메시지를 조회하도록 애플리케이션의 기능을 확장합니다.
MessageService클래스에서 ID로 개별 메시지를 조회하는 새 함수findMessageById(id: String)를 추가합니다.kotlin// MessageService.kt package com.example.demo import org.springframework.stereotype.Service import org.springframework.jdbc.core.JdbcTemplate import org.springframework.jdbc.core.query import java.util.* @Service class MessageService(private val db: JdbcTemplate) { fun findMessages(): List<Message> = db.query("select * from messages") { response, _ -> Message(response.getString("id"), response.getString("text")) } fun findMessageById(id: String): Message? = db.query("select * from messages where id = ?", id) { response, _ -> Message(response.getString("id"), response.getString("text")) }.singleOrNull() fun save(message: Message): Message { val id = message.id ?: UUID.randomUUID().toString() // id가 null이면 새 id 생성 db.update( "insert into messages values ( ?, ? )", id, message.text ) return message.copy(id = id) // 새 id를 가진 메시지의 복사본 반환 } }파라미터 목록에서의 vararg 인자 위치
query()함수는 세 개의 인자를 받습니다.- 실행을 위해 파라미터가 필요한 SQL 쿼리 문자열
- String 타입의 파라미터인
id - 람다 식으로 구현된
RowMapper인스턴스
query()함수의 두 번째 파라미터는 가변 인자(vararg)로 선언되었습니다. Kotlin에서는 가변 인자 파라미터의 위치가 파라미터 목록의 마지막일 필요는 없습니다.singleOrNull() 함수
singleOrNull()함수는 단일 요소를 반환하거나, 배열이 비어 있거나 동일한 값을 가진 요소가 둘 이상인 경우null을 반환합니다.ID로 메시지를 가져오는 데 사용된
.query()함수는 Spring 프레임워크에서 제공하는 Kotlin 확장 함수(extension function)입니다. 위 코드에 표시된 것처럼 추가적인 importimport org.springframework.jdbc.core.query가 필요합니다.MessageController클래스에id파라미터를 받는 새getMessage(...)함수를 추가합니다.kotlin// MessageController.kt package com.example.demo import org.springframework.http.ResponseEntity import org.springframework.web.bind.annotation.GetMapping import org.springframework.web.bind.annotation.PathVariable import org.springframework.web.bind.annotation.PostMapping import org.springframework.web.bind.annotation.RequestBody import org.springframework.web.bind.annotation.RequestMapping import org.springframework.web.bind.annotation.RestController import java.net.URI @RestController @RequestMapping("/") class MessageController(private val service: MessageService) { @GetMapping fun listMessages() = ResponseEntity.ok(service.findMessages()) @PostMapping fun post(@RequestBody message: Message): ResponseEntity<Message> { val savedMessage = service.save(message) return ResponseEntity.created(URI("/${savedMessage.id}")).body(savedMessage) } @GetMapping("/{id}") fun getMessage(@PathVariable id: String): ResponseEntity<Message> = service.findMessageById(id).toResponseEntity() private fun Message?.toResponseEntity(): ResponseEntity<Message> = // 메시지가 null(찾을 수 없음)이면 응답 코드를 404로 설정 this?.let { ResponseEntity.ok(it) } ?: ResponseEntity.notFound().build() }컨텍스트 경로에서 값 조회
새 함수에
@GetMapping("/{id}")를 붙였으므로 Spring 프레임워크가 컨텍스트 경로에서 메시지id를 조회합니다. 함수 인자에@PathVariable을 붙임으로써, 프레임워크가 조회된 값을 함수 인자로 사용하도록 지시합니다. 새 함수는MessageService를 호출하여 ID로 개별 메시지를 조회합니다.널이 가능한 수신 객체를 가진 확장 함수
확장은 널이 가능한 수신 객체 타입(nullable receiver type)으로 정의할 수 있습니다. 수신 객체가
null이면this또한null입니다. 따라서 널이 가능한 수신 객체 타입으로 확장을 정의할 때는 함수 본문 내에서this == null체크를 수행하는 것이 권장됩니다.위의
toResponseEntity()함수에서처럼 널 체크를 수행하기 위해 널 안전 호출 연산자(?.)를 사용할 수도 있습니다.kotlinResponseEntity
ResponseEntity는 상태 코드, 헤더, 바디를 포함한 HTTP 응답을 나타냅니다. 이는 콘텐츠를 더 세밀하게 제어하면서 클라이언트에 맞춤형 HTTP 응답을 보낼 수 있게 해주는 제네릭 래퍼입니다.
다음은 애플리케이션의 전체 코드입니다.
// DemoApplication.kt
package com.example.demo

import org.springframework.boot.autoconfigure.SpringBootApplication
import org.springframework.boot.runApplication

@SpringBootApplication
class DemoApplication

fun main(args: Array<String>) {
    runApplication<DemoApplication>(*args)
}// Message.kt
package com.example.demo
data class Message(val id: String?, val text: String)// MessageService.kt
package com.example.demo
import org.springframework.stereotype.Service
import org.springframework.jdbc.core.JdbcTemplate
import org.springframework.jdbc.core.query
import java.util.*
@Service
class MessageService(private val db: JdbcTemplate) {
fun findMessages(): List<Message> = db.query("select * from messages") { response, _ ->
Message(response.getString("id"), response.getString("text"))
}
fun findMessageById(id: String): Message? = db.query("select * from messages where id = ?", id) { response, _ ->
Message(response.getString("id"), response.getString("text"))
}.singleOrNull()
fun save(message: Message): Message {
val id = message.id ?: UUID.randomUUID().toString()
db.update(
"insert into messages values ( ?, ? )",
id, message.text
)
return message.copy(id = id)
}
}// MessageController.kt
package com.example.demo
import org.springframework.http.ResponseEntity
import org.springframework.web.bind.annotation.GetMapping
import org.springframework.web.bind.annotation.PathVariable
import org.springframework.web.bind.annotation.PostMapping
import org.springframework.web.bind.annotation.RequestBody
import org.springframework.web.bind.annotation.RequestMapping
import org.springframework.web.bind.annotation.RestController
import java.net.URI
@RestController
@RequestMapping("/")
class MessageController(private val service: MessageService) {
@GetMapping
fun listMessages() = ResponseEntity.ok(service.findMessages())
@PostMapping
fun post(@RequestBody message: Message): ResponseEntity<Message> {
val savedMessage = service.save(message)
return ResponseEntity.created(URI("/${savedMessage.id}")).body(savedMessage)
}
@GetMapping("/{id}")
fun getMessage(@PathVariable id: String): ResponseEntity<Message> =
service.findMessageById(id).toResponseEntity()
private fun Message?.toResponseEntity(): ResponseEntity<Message> =
this?.let { ResponseEntity.ok(it) } ?: ResponseEntity.notFound().build()
}애플리케이션 실행
Spring 애플리케이션을 실행할 준비가 되었습니다.
애플리케이션을 다시 실행합니다.
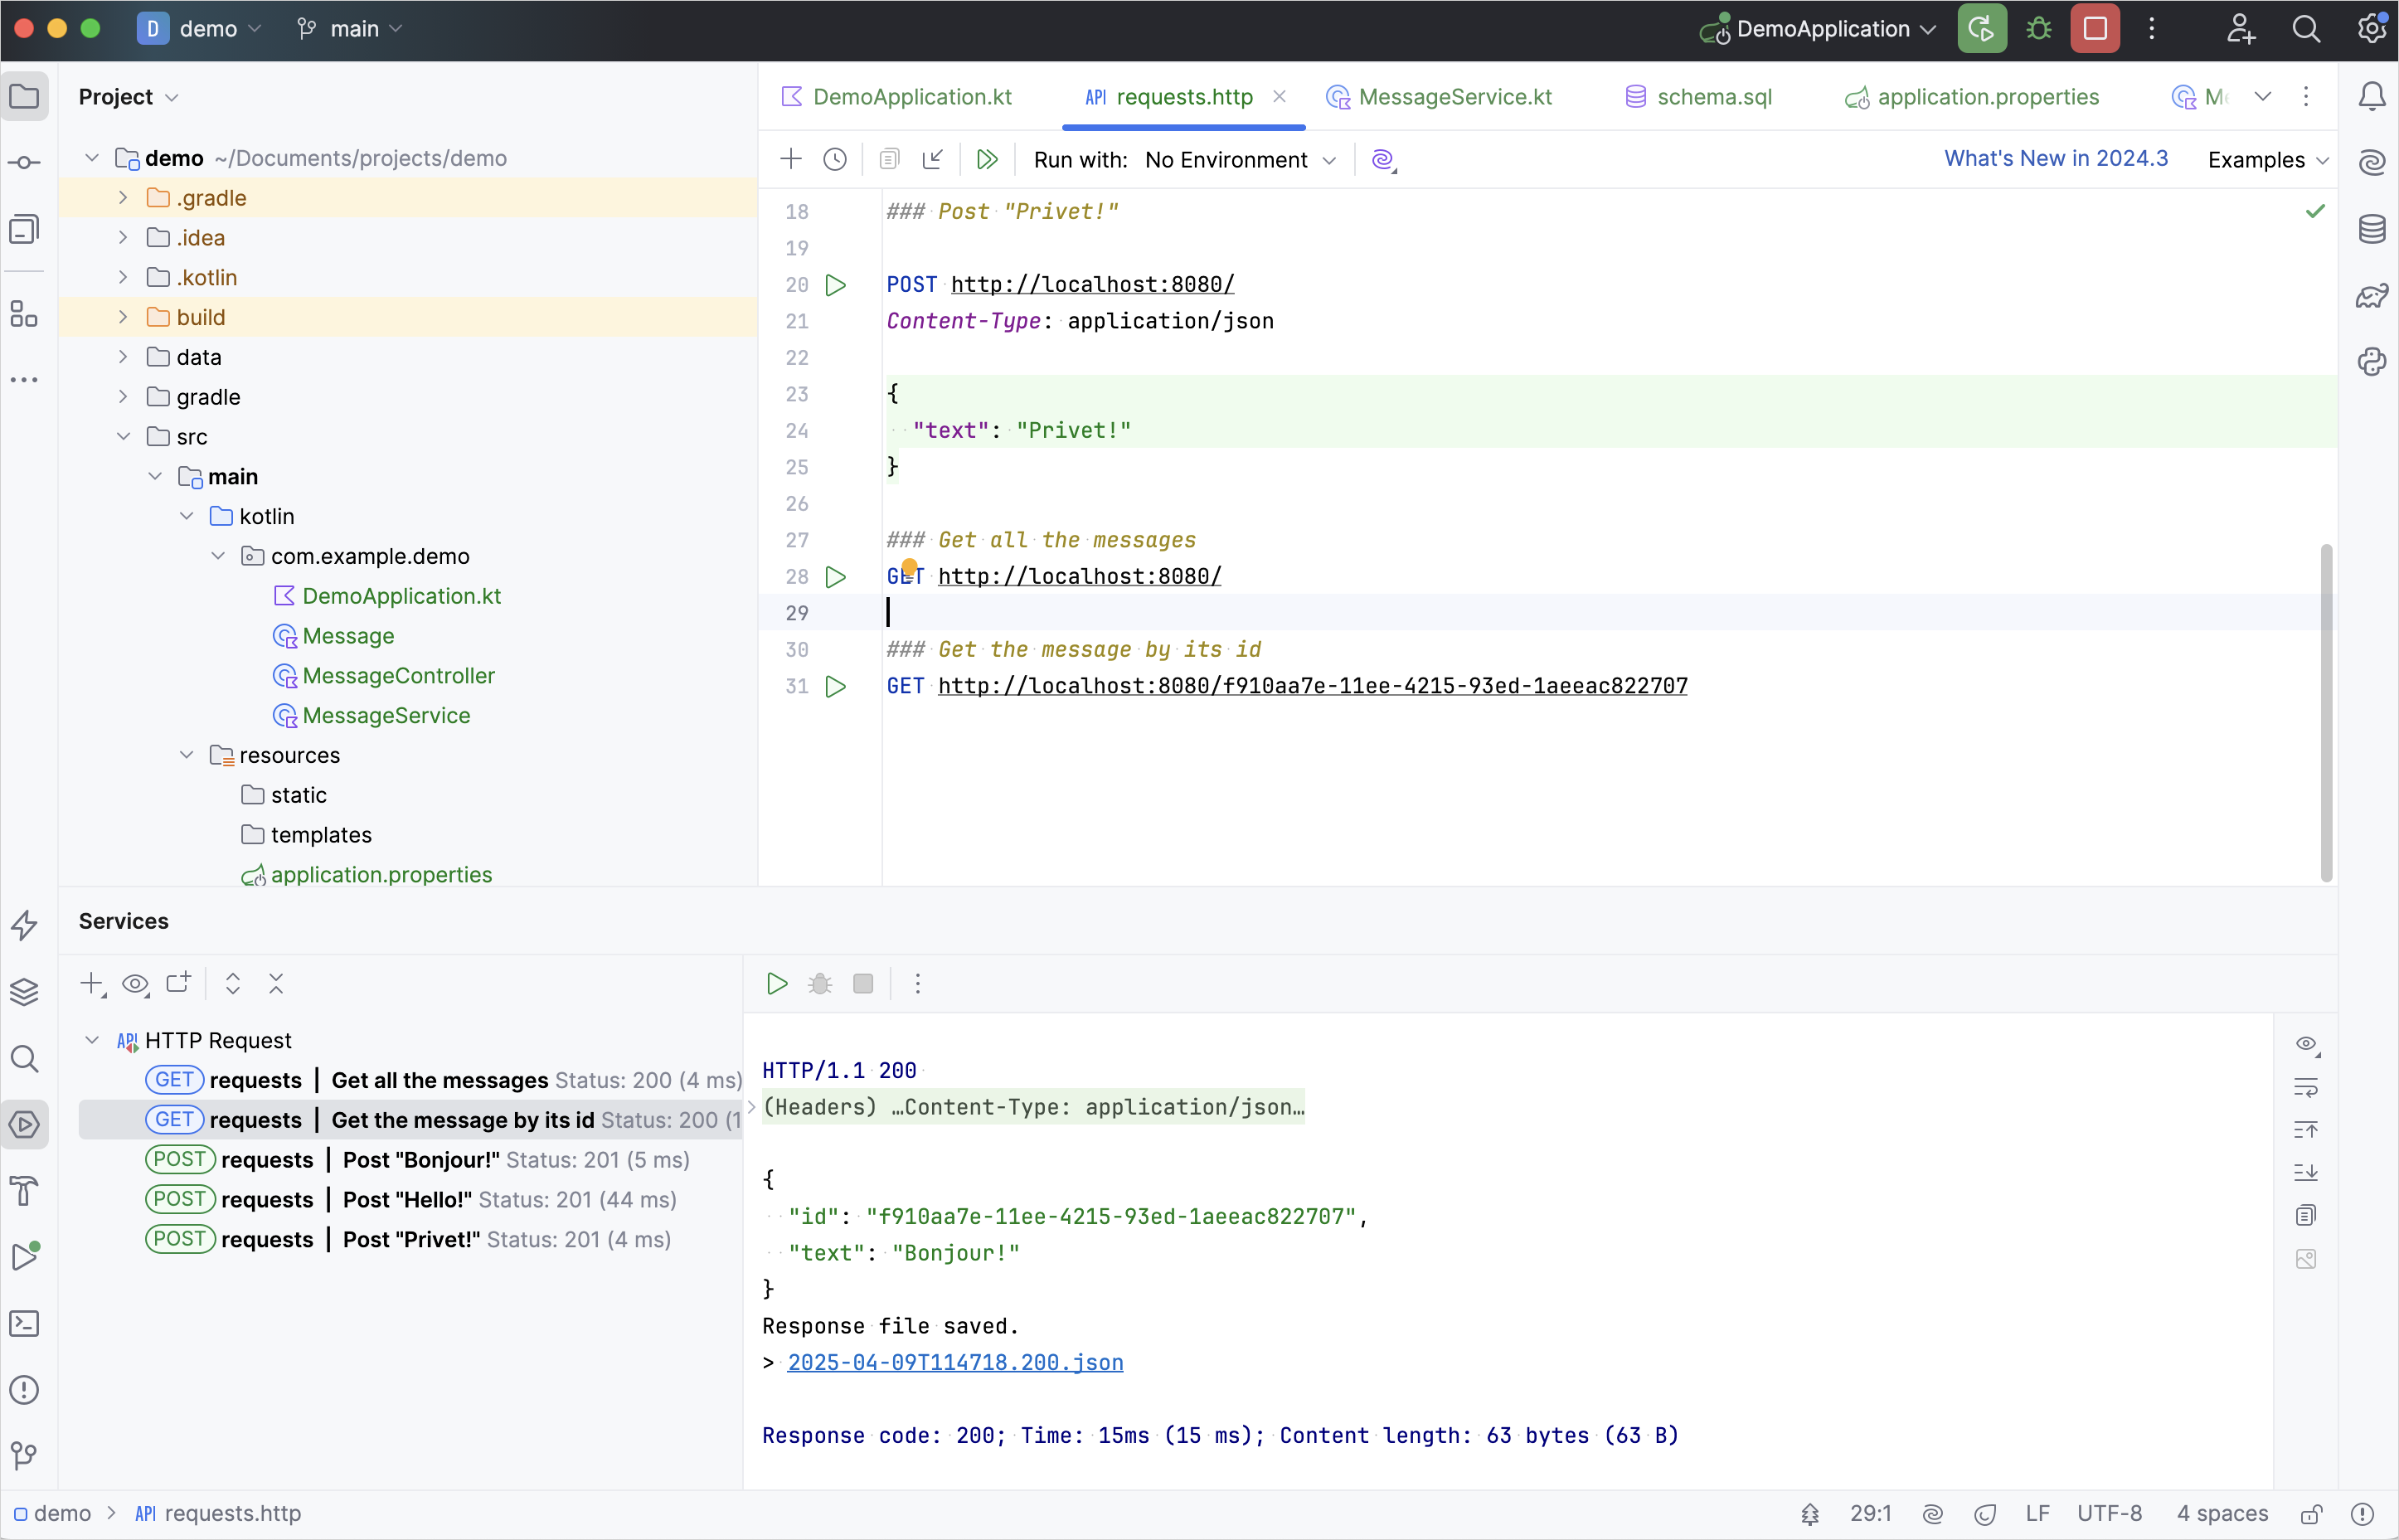
requests.http파일을 열고 새로운 GET 요청을 추가합니다.http### ID로 메시지 가져오기 GET http://localhost:8080/idGET 요청을 실행하여 데이터베이스에서 모든 메시지를 조회합니다.
Run 도구 창에서 ID 중 하나를 복사하여 다음과 같이 요청에 추가합니다.
http### ID로 메시지 가져오기 GET http://localhost:8080/f910aa7e-11ee-4215-93ed-1aeeac822707위에 언급된 ID 대신 자신의 메시지 ID를 입력하세요.
GET 요청을 실행하고 Run 도구 창에서 결과를 확인합니다.
다음 단계
마지막 단계에서는 Spring Data를 사용하여 더 대중적인 방식으로 데이터베이스에 연결하는 방법을 보여줍니다.