Kotlin과 JUnit을 사용하여 Java 코드 테스트하기 – 튜토리얼
Kotlin은 Java와 완전히 상호 운용 가능하므로, Kotlin을 사용하여 Java 코드에 대한 테스트를 작성하고 동일한 프로젝트 내의 기존 Java 테스트와 함께 실행할 수 있습니다.
이 튜토리얼에서는 다음 내용을 배웁니다:
- JUnit을 사용하여 테스트를 실행하도록 Java–Kotlin 혼합 프로젝트를 구성하는 방법.
- Java 코드를 검증하는 Kotlin 테스트를 추가하는 방법.
- Maven 또는 Gradle을 사용하여 테스트를 실행하는 방법.
시작하기 전에 다음 사항을 확인하세요:
- IntelliJ IDEA 또는 Kotlin 확장이 설치된 VS Code.
- Java 17 이상.
프로젝트 구성하기
IDE에서 버전 관리 시스템을 통해 예제 프로젝트를 클론합니다:
texthttps://github.com/kotlin-hands-on/kotlin-junit-sample.gitinitial모듈로 이동하여 프로젝트 구조를 확인합니다:textkotlin-junit-sample/ ├── initial/ │ ├── src/ │ │ ├── main/java/ # Java 소스 코드 │ │ └── test/java/ # Java로 작성된 JUnit 테스트 │ ├── pom.xml # Maven 설정 │ └── build.gradle.kts # Gradle 설정initial모듈에는 단일 테스트가 포함된 간단한 Java용 Todo 애플리케이션이 들어 있습니다.같은 디렉토리에서 빌드 파일을 열고 Kotlin을 지원하도록 내용을 업데이트합니다:
xml<properties>섹션에서 Kotlin 버전을 설정합니다.<dependencies>섹션에 테스트 실행을 위한 JUnit Jupiter 의존성을 추가합니다.<build><plugins>섹션에<extensions>가true로 설정된kotlin-maven-plugin을 적용합니다. 이는 빌드에 해당하는 실행(execution)과kotlin-stdlib의존성을 자동으로 추가합니다.- 확장(extensions)과 함께 Kotlin Maven 플러그인을 사용할 때는
<build><pluginManagement>섹션에maven-compiler-plugin을 추가할 필요가 없습니다.
kotlin// build.gradle.kts group = "org.jetbrains.kotlin" version = "1.0-SNAPSHOT" description = "kotlin-junit-complete" java.sourceCompatibility = JavaVersion.VERSION_17 plugins { application kotlin("jvm") version "2.4.0" } kotlin { jvmToolchain(17) } application { mainClass.set("org.jetbrains.kotlin.junit.App") } repositories { mavenCentral() } dependencies { implementation("com.gitlab.klamonte:jexer:1.6.0") testImplementation(kotlin("test")) testImplementation(libs.org.junit.jupiter.junit.jupiter.api) testImplementation(libs.org.junit.jupiter.junit.jupiter.params) testRuntimeOnly(libs.org.junit.jupiter.junit.jupiter.engine) testRuntimeOnly(libs.org.junit.platform.junit.platform.launcher) } tasks.test { useJUnitPlatform() }plugins {}블록에kotlin("jvm")플러그인을 추가합니다.- JVM 툴체인 버전을 사용 중인 Java 버전과 일치하도록 설정합니다.
dependencies {}블록에 Kotlin의 테스트 유틸리티를 제공하고 JUnit과 통합되는kotlin.test라이브러리를 추가합니다.
Kotlin/JVM은 최신 안정 버전인 JUnit 6을 지원합니다.
gradle/libs.versions.toml버전 카탈로그에서 확인할 수 있습니다.일반적으로 버전 카탈로그 사용을 선호한다면, 다음과 같이
kotlin("jvm")플러그인을 추가할 수도 있습니다:toml# gradle/libs.versions.toml [versions] kotlin = "2.4.0" junit = "6.0.3" [libraries] org-junit-jupiter-junit-jupiter-api = { module = "org.junit.jupiter:junit-jupiter-api", version.ref = "junit" } org-junit-jupiter-junit-jupiter-params = { module = "org.junit.jupiter:junit-jupiter-params", version.ref = "junit" } org-junit-jupiter-junit-jupiter-engine = { module = "org.junit.jupiter:junit-jupiter-engine", version.ref = "junit" } org-junit-platform-junit-platform-launcher = { module = "org.junit.platform:junit-platform-launcher" } [plugins] kotlinJvm = { id = "org.jetbrains.kotlin.jvm", version.ref = "kotlin" }IDE에서 빌드 파일을 다시 로드(Reload)합니다.
빌드 파일 설정에 대한 자세한 내용은 프로젝트 구성을 참고하세요.
첫 번째 Kotlin 테스트 추가하기
initial/src/test/java에 있는 TodoItemTest.java 테스트는 이미 항목 생성, 기본값, 고유 ID 및 상태 변경과 같은 앱의 기본 사항을 검증하고 있습니다.
리포지토리 레벨의 동작을 검증하는 Kotlin 테스트를 추가하여 테스트 커버리지를 확장할 수 있습니다:
동일한 테스트 소스 디렉토리인
initial/src/test/java로 이동합니다.Java 테스트와 동일한 패키지에
TodoRepositoryTest.kt파일을 생성합니다.필드 선언과 설정(setup) 함수가 포함된 테스트 클래스를 생성합니다:
kotlinpackage org.jetbrains.kotlin.junit import org.junit.jupiter.api.BeforeEach import org.junit.jupiter.api.Assertions import org.junit.jupiter.api.Test import org.junit.jupiter.api.DisplayName internal class TodoRepositoryTest { lateinit var repository: TodoRepository lateinit var testItem1: TodoItem lateinit var testItem2: TodoItem @BeforeEach fun setUp() { repository = TodoRepository() testItem1 = TodoItem("Task 1", "Description 1") testItem2 = TodoItem("Task 2", "Description 2") } }- JUnit 어노테이션은 Java에서와 마찬가지로 Kotlin에서도 동일하게 작동합니다.
- Kotlin에서
lateinit키워드를 사용하면 나중에 초기화되는 null이 아닌 프로퍼티를 선언할 수 있습니다. 이는 테스트에서 nullable 타입(TodoRepository?)을 사용해야 하는 상황을 방지하는 데 도움이 됩니다.
TodoRepositoryTest클래스 내에 초기 리포지토리 상태와 크기를 확인하는 테스트를 추가합니다:kotlin@Test @DisplayName("Should start with empty repository") fun shouldStartEmpty() { Assertions.assertEquals(0, repository.size()) Assertions.assertTrue(repository.all.isEmpty()) }- Java의 정적 임포트(static import)와 달리, Jupiter의
Assertions는 클래스로 임포트되며 단언(assertion) 함수의 수식어(qualifier)로 사용됩니다. - Kotlin에서는
repository.all과 같이 Java 게터(getter)를 프로퍼티로 접근할 수 있으므로.getAll()호출 대신 사용할 수 있습니다.
- Java의 정적 임포트(static import)와 달리, Jupiter의
모든 항목에 대한 복사 동작을 검증하는 또 다른 테스트를 작성합니다:
kotlin@Test @DisplayName("Should return defensive copy of items") fun shouldReturnDefensiveCopy() { repository.add(testItem1) val items1 = repository.all val items2 = repository.all Assertions.assertNotSame(items1, items2) Assertions.assertThrows( UnsupportedOperationException::class.java ) { items1.clear() } Assertions.assertEquals(1, repository.size()) }- Kotlin 클래스에서 Java 클래스 객체를 얻으려면
::class.java를 사용합니다. - 복잡한 단언문은 별도의 특수 줄 바꿈 문자 없이 여러 줄로 나눌 수 있습니다.
- Kotlin 클래스에서 Java 클래스 객체를 얻으려면
ID로 항목을 찾는 기능을 검증하는 테스트를 추가합니다:
kotlin@Test @DisplayName("Should find item by ID") fun shouldFindItemById() { repository.add(testItem1) repository.add(testItem2) val found = repository.getById(testItem1.id()) Assertions.assertTrue(found.isPresent) Assertions.assertEquals(testItem1, found.get()) }Kotlin은 Java의
OptionalAPI와 매끄럽게 연동됩니다. 게터 메서드를 프로퍼티로 자동 변환하므로, 여기서는isPresent()메서드를 프로퍼티로 접근합니다.항목 삭제 메커니즘을 검증하는 테스트를 작성합니다:
kotlin@Test @DisplayName("Should remove item by ID") fun shouldRemoveItemById() { repository.add(testItem1) repository.add(testItem2) val removed = repository.remove(testItem1.id()) Assertions.assertTrue(removed) Assertions.assertEquals(1, repository.size()) Assertions.assertTrue(repository.getById(testItem1.id()).isEmpty) Assertions.assertTrue(repository.getById(testItem2.id()).isPresent) } @Test @DisplayName("Should return false when removing non-existent item") fun shouldReturnFalseForNonExistentRemoval() { repository.add(testItem1) val removed = repository.remove("non-existent-id") Assertions.assertFalse(removed) Assertions.assertEquals(1, repository.size()) }Kotlin에서는
repository.getById(id).isEmpty와 같이 메서드 호출과 프로퍼티 접근을 체이닝할 수 있습니다.
추가적인 기능을 다루기 위해
TodoRepositoryTest테스트 클래스에 더 많은 테스트를 추가할 수 있습니다. 전체 소스 코드는 예제 프로젝트의complete모듈을 확인하세요.
테스트 실행하기
프로젝트가 예상대로 작동하는지 확인하기 위해 Java와 Kotlin 테스트를 모두 실행합니다:
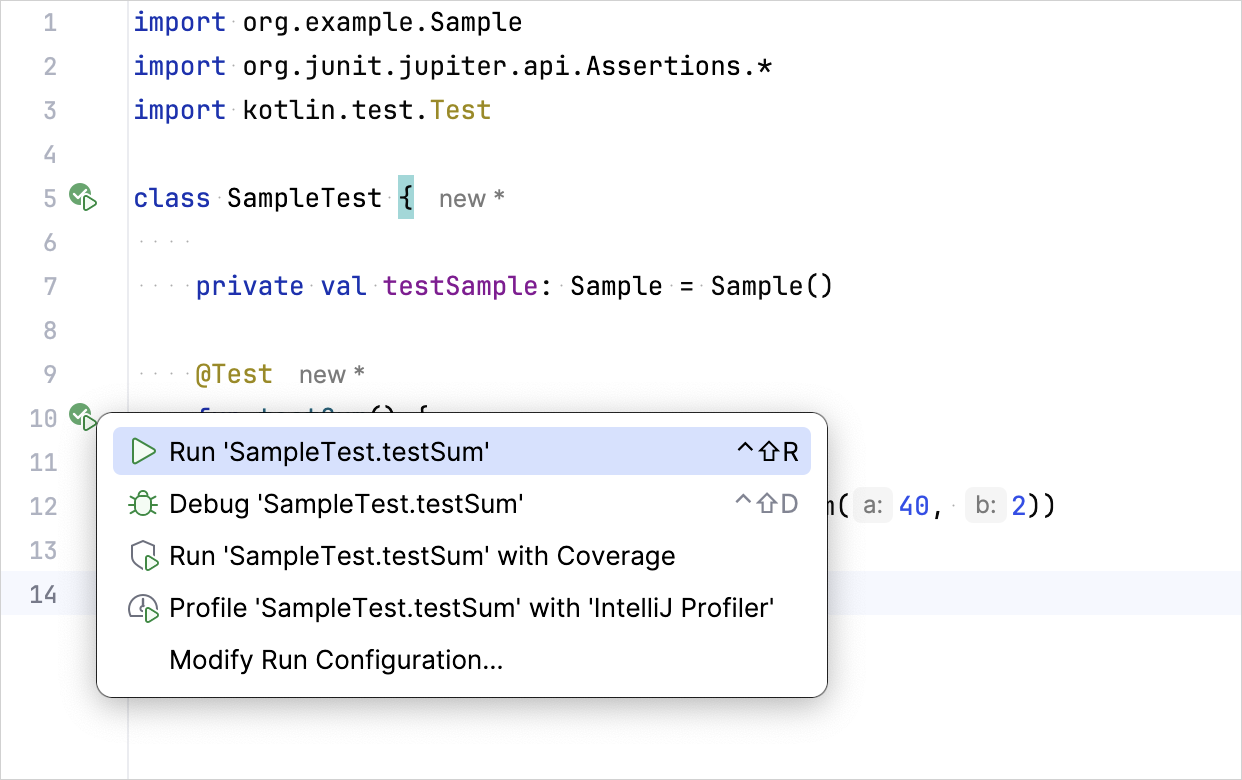
거터(gutter) 아이콘을 사용하여 테스트를 실행합니다:
명령줄을 사용하여
initial디렉토리에서 모든 프로젝트 테스트를 실행할 수도 있습니다:bashmvn testbash./gradlew test변수 값 중 하나를 변경하여 테스트가 올바르게 작동하는지 확인합니다. 예를 들어,
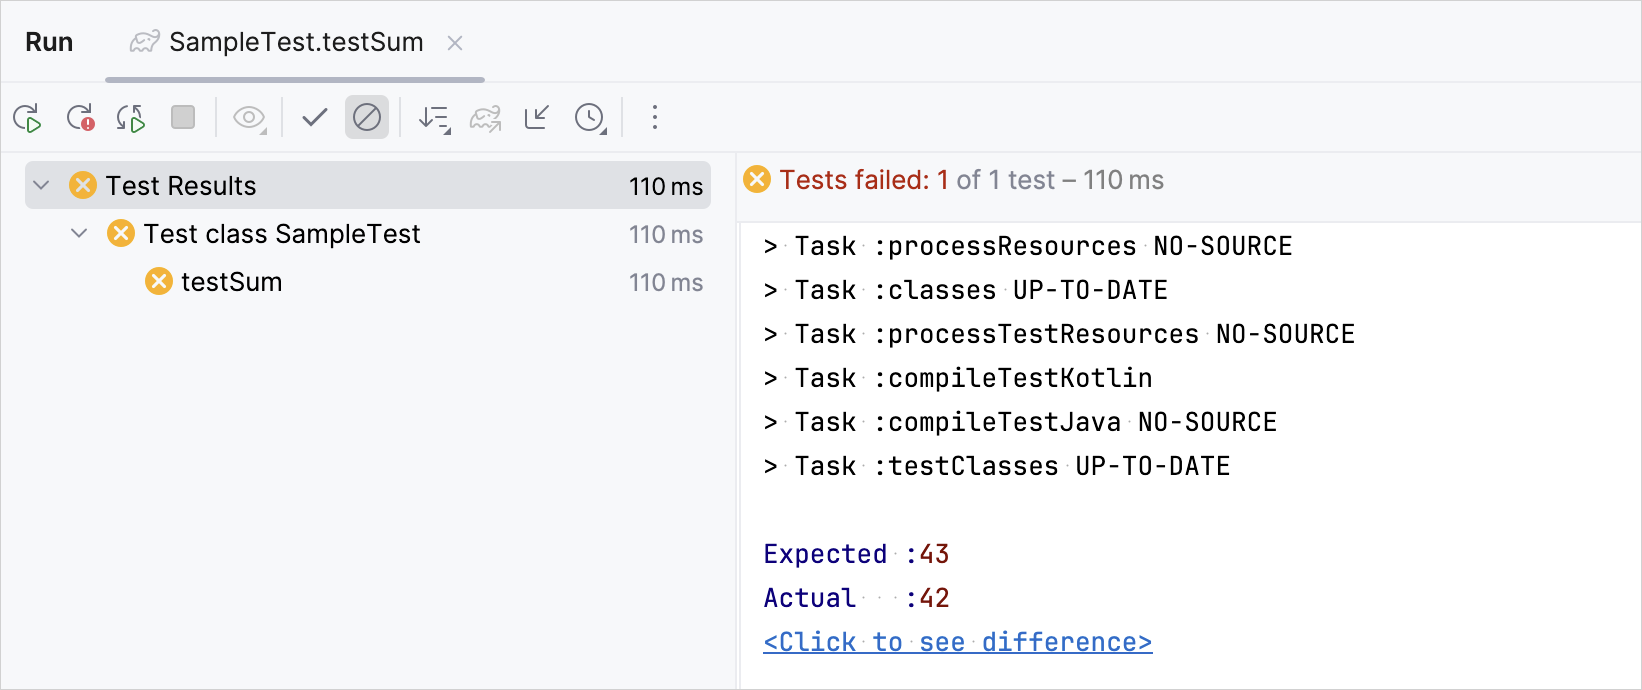
shouldAddItem테스트를 수정하여 잘못된 리포지토리 크기를 기대하도록 만듭니다:kotlin@Test @DisplayName("Should add item to repository") fun shouldAddItem() { repository.add(testItem1) Assertions.assertEquals(2, repository.size()) // 1에서 2로 변경 Assertions.assertTrue(repository.all.contains(testItem1)) }테스트를 다시 실행하고 실패하는지 확인합니다:
테스트가 포함된 전체 구성 프로젝트는 예제 프로젝트의
complete모듈에서 찾을 수 있습니다.
다음 단계
Maven으로 Kotlin 프로젝트 테스트하기에 대해 자세히 알아보세요.