KSP 快速入门
//: # (description: 在您的项目中添加基于 Kotlin 符号处理 (KSP) 的注解处理器,或使用 KSP API 创建您自己的处理器。)
在本指南中,您将学习:
- 如何在您的项目中添加基于 KSP 的注解处理器。
- 如何使用 KSP API 创建您自己的注解处理器。
- 在何处可以找到处理器生成的代码。
在您的项目中添加基于 KSP 的处理器
要在项目中使用外部处理器,请将 KSP 添加到您的 build.gradle(.kts) 文件中的 plugins {} 代码块。如果仅在特定模块中需要该处理器,请将其添加到该模块的 build.gradle(.kts) 文件中:
// build.gradle.kts

plugins {
    kotlin("jvm") version "2.4.0"
    id("com.google.devtools.ksp") version "2.3.9"
}// build.gradle
plugins {
id 'org.jetbrains.kotlin.jvm' version '2.4.0'
id 'com.google.devtools.ksp' version '2.3.9'
}要查找 KSP 的最新版本,请查看 GitHub 发布页面 (Releases)。
在顶层的 dependencies {} 代码块中,添加您想要使用的处理器。本示例使用 Moshi,但对于其他处理器,方法也是相同的:
// build.gradle.kts

dependencies {
    ksp("com.squareup.moshi:moshi-kotlin-codegen:1.15.2")
}// build.gradle
dependencies {
ksp 'com.squareup.moshi:moshi-kotlin-codegen:1.15.2'
}创建您自己的处理器
通过遵循以下步骤,您将创建一个简单的注解处理器,它将生成一个 helloWorld() 函数。虽然这在实践中并不是很有用,但它演示了创建您自己的处理器和注解的基础知识。
将 KSP 添加到项目中
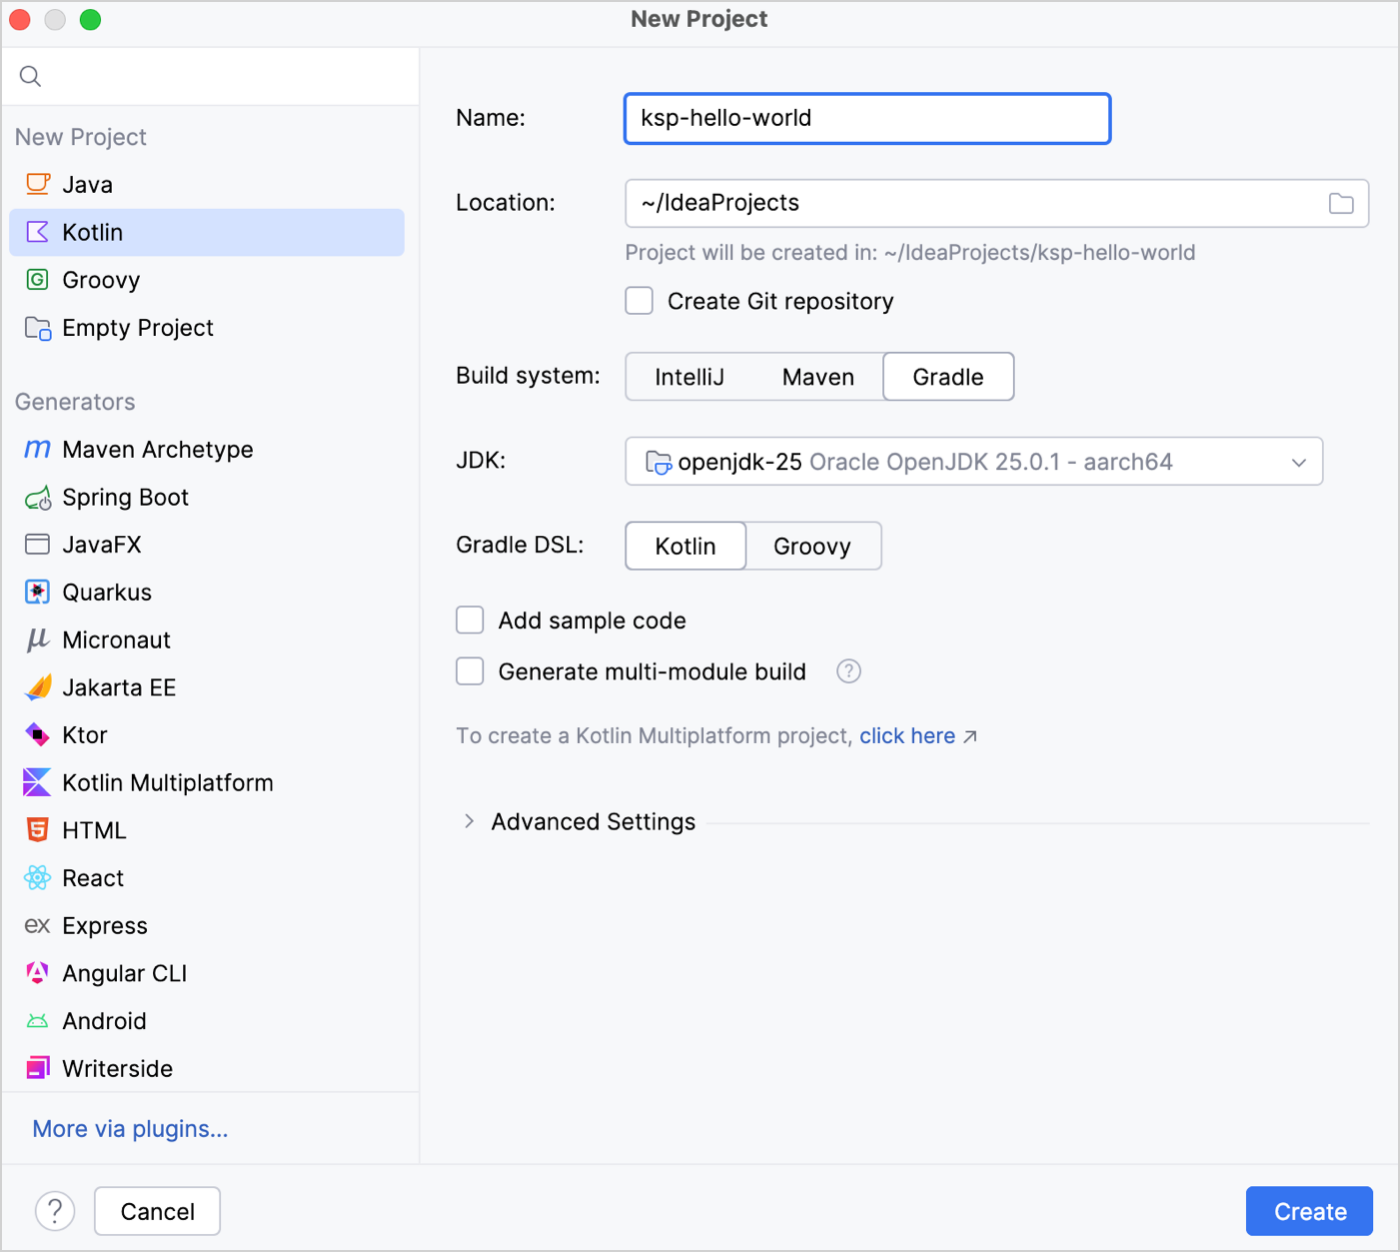
创建一个新的 Kotlin 项目并添加 KSP 插件:
在 IntelliJ IDEA 中,选择 File | New | Project。
在左侧列表中,选择 Kotlin。
选择 Gradle 作为构建系统并点击 Create。
将 KSP 插件添加到
build.gradle(.kts)文件中:kotlin// build.gradle.kts plugins { kotlin("jvm") version "2.4.0" id("com.google.devtools.ksp") version "2.3.9" apply false }groovy// build.gradle plugins { id 'org.jetbrains.kotlin.jvm' version '2.4.0' id 'com.google.devtools.ksp' version '2.3.9' apply false }
创建注解
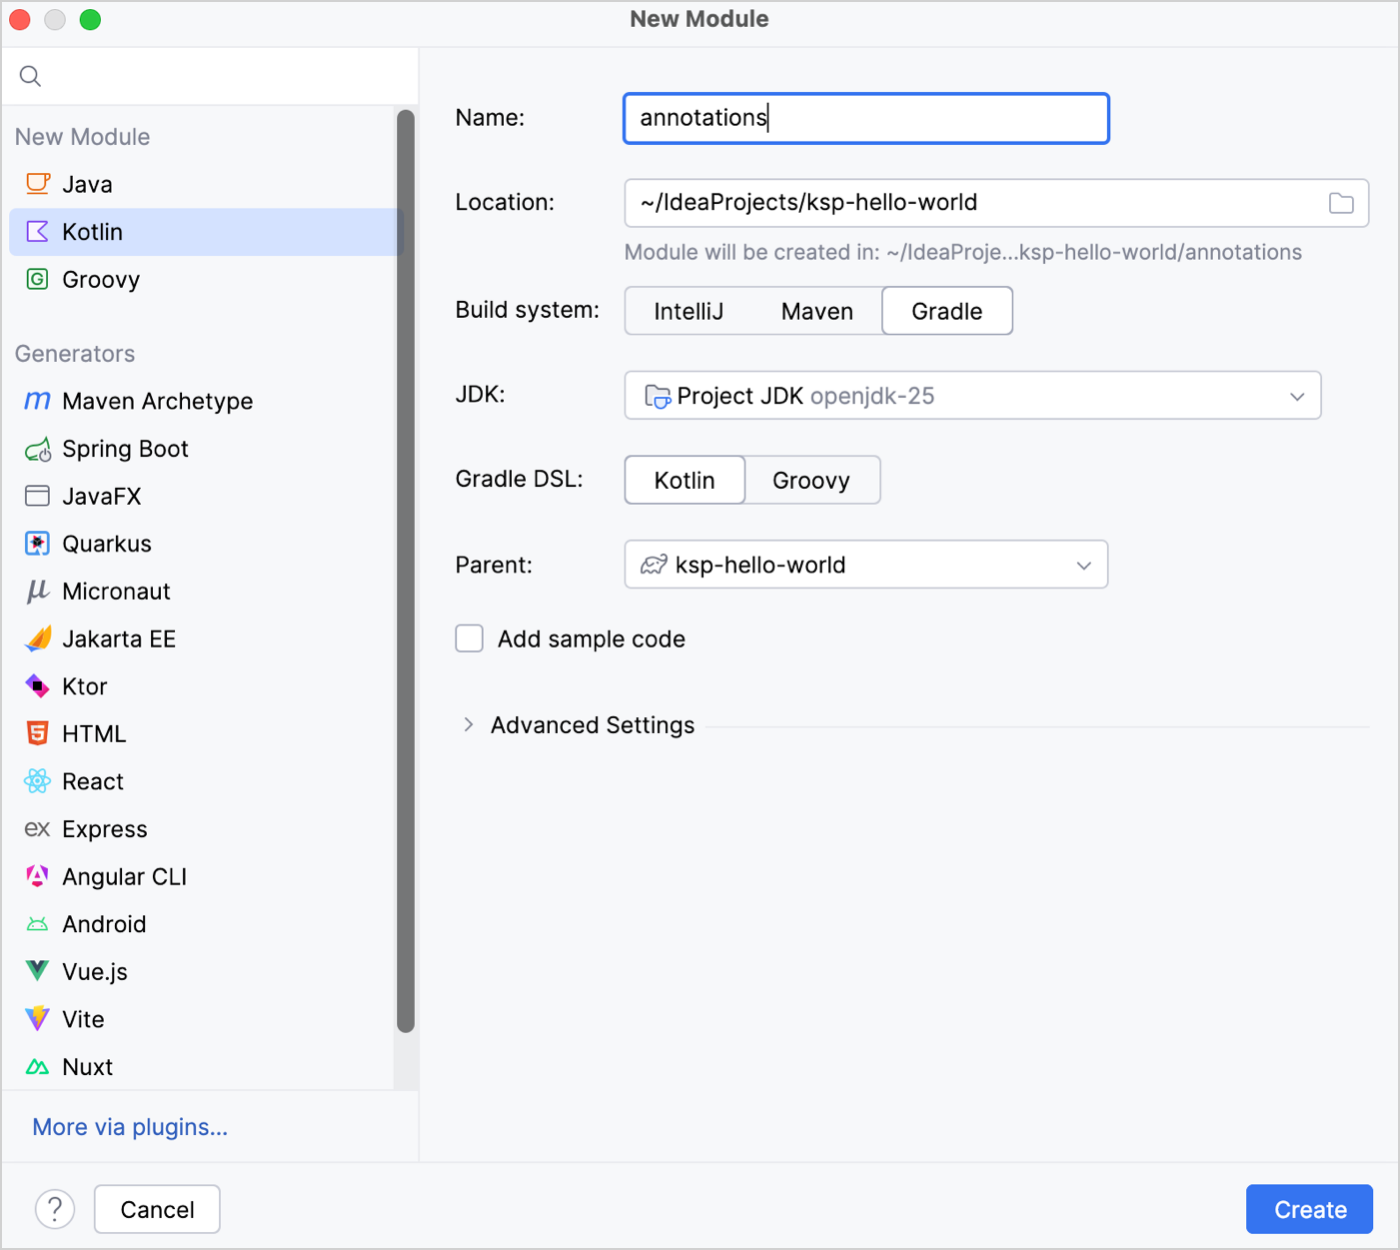
在项目的根目录下创建一个新模块并声明一个注解:
选择 File | New | Module。
在左侧列表中,选择 Kotlin。
指定以下字段并点击 create:
- Name: annotations
- Build system: Gradle
在模块中,创建一个
HelloWorldAnnotation.kt文件并声明一个名为HelloWorldAnnotation的注解:kotlin// annotations/src/main/kotlin/com/example/annotations/HelloWorldAnnotation.kt package com.example.annotations annotation class HelloWorldAnnotation
创建并注册处理器
在项目的根目录下创建另一个名为 processor 的模块。
在模块的
build.gradle(.kts)文件中,将 KSP API 和您声明的注解添加为依赖项:kotlin// processor/build.gradle.kts plugins { kotlin("jvm") } dependencies { implementation(project(":annotations")) implementation("com.google.devtools.ksp:symbol-processing-api:2.3.6") }groovy// processor/build.gradle plugins { id 'org.jetbrains.kotlin.jvm' } dependencies { implementation project ':annotations' implementation 'com.google.devtools.ksp:symbol-processing-api:2.3.6' }在 processor 模块中,创建一个新的
HelloWorldProcessor.kt文件并添加以下代码:kotlin// processor/src/main/kotlin/HelloWorldProcessor.kt class HelloWorldProcessor(val codeGenerator: CodeGenerator) : SymbolProcessor { // 1️⃣ process() 函数 override fun process(resolver: Resolver): List<KSAnnotated> { resolver .getSymbolsWithAnnotation("com.example.annotations.HelloWorldAnnotation") .filter { it.validate() } .filterIsInstance<KSFunctionDeclaration>() .forEach { it.accept(HelloWorldVisitor(), Unit) } return emptyList() } // 2️⃣ 访问器 (Visitor) inner class HelloWorldVisitor : KSVisitorVoid() { override fun visitFunctionDeclaration(function: KSFunctionDeclaration, data: Unit) { createNewFileFrom(function).use { file -> file.write( """ fun helloWorld(): Unit { println("Hello world from function generated by KSP") } """.trimIndent() ) } } } // 3️⃣ createNewFileFrom() 函数 private fun createNewFileFrom(function: KSFunctionDeclaration): OutputStream { return codeGenerator.createNewFile( dependencies = createDependencyOn(function), packageName = "", fileName = "GeneratedHelloWorld" ) } // 3️⃣ createDependencyOn() 函数 private fun createDependencyOn(function: KSFunctionDeclaration): Dependencies { return Dependencies(aggregating = false, function.containingFile!!) } } // 用于将字符串写入 OutputStream 的辅助函数 fun OutputStream.write(string: String): Unit { this.write(string.toByteArray()) }添加 IDE 建议的导入。确保从
com.google.devtools.ksp.processing导入Resolver和Dependencies类。或者,将这些行复制到HelloWorldProcessor.kt的顶部:kotlin// processor/src/main/kotlin/HelloWorldProcessor.kt import com.google.devtools.ksp.processing.CodeGenerator import com.google.devtools.ksp.processing.Dependencies import com.google.devtools.ksp.processing.Resolver import com.google.devtools.ksp.processing.SymbolProcessor import com.google.devtools.ksp.symbol.KSAnnotated import com.google.devtools.ksp.symbol.KSFunctionDeclaration import com.google.devtools.ksp.symbol.KSVisitorVoid import com.google.devtools.ksp.validate import java.io.OutputStream让我们来看一下代码:
1️⃣
process()函数包含处理器的主要逻辑。它获取所有被HelloWorldAnnotation注解的符号,并为每个符号调用HelloWorldVisitor。process()函数返回一个待处理符号列表,以便在后续轮次中进行处理。在本示例中,它安全地返回了emptyList()。更多信息请参阅多轮处理。2️⃣ 处理器使用访问器遍历 KSP 视图下的 Kotlin 抽象语法树 (AST)。在
HelloWorldPocessor类内部,HelloWorldVisitor类就是该访问器。由于HelloWorldAnnotation仅用于函数,因此仅重写了visitFunctionDeclaration()。KSVisitorVoid是 KSP 提供的访问器类之一,您可以重写并进行适配。您还可以通过实现KSVisitor<D, R>接口 来创建您自己的访问器。3️⃣
createNewFileFrom()创建 KSP 生成代码的文件。createDependencyOn()使输出文件依赖于使用该注解的源文件。要了解有关 KSP 如何创建和管理文件的更多信息,请访问
CodeGenerator接口 的源代码。
创建一个
HelloWorldProcessorProvider.kt文件。在其中声明一个继承自SymbolProcessorProvider的HelloWorldProcessorProvider类:kotlin// processor/src/main/kotlin/HelloWorldProcessorProvider.kt import com.google.devtools.ksp.processing.SymbolProcessor import com.google.devtools.ksp.processing.SymbolProcessorEnvironment import com.google.devtools.ksp.processing.SymbolProcessorProvider class HelloWorldProcessorProvider : SymbolProcessorProvider { override fun create(environment: SymbolProcessorEnvironment): SymbolProcessor { return HelloWorldProcessor(environment.codeGenerator) } }注册处理器提供程序。在
resources/META-INF/services目录中,创建一个com.google.devtools.ksp.processing.SymbolProcessorProvider文件并添加提供程序的完全限定名称:text## processor/src/main/resources/META-INF/services/com.google.devtools.ksp.processing.SymbolProcessorProvider HelloWorldProcessorProvider
使用您的处理器
现在您已准备好测试您的处理器。请遵循以下步骤创建一个客户端模块,并让您的处理器根据被注解的元素生成代码:
在项目的根目录下创建一个名为
app的模块。在该模块的
build.gradle(.kts)文件中:- 将 KSP 插件添加到
plugins {}代码块中。 - 将您的处理器和注解添加到
dependencies {}代码块中。
例如:
kotlin// app/build.gradle.kts plugins { kotlin("jvm") id("com.google.devtools.ksp") } dependencies { implementation(project(":annotations")) ksp(project(":processor")) }groovy// app/build.gradle plugins { id 'com.google.devtools.ksp' } dependencies { implementation project (':annotations') ksp project (':processor') }- 将 KSP 插件添加到
在项目级的
settings.gradle(.kts)文件中,确保所有子模块都已自动包含:kotlin// settings.gradle.kts include("annotations") include("app") include("processor")groovy// settings.gradle include 'processor' include 'annotations' include 'app'在
app模块中,创建一个Main.kt文件并添加以下代码:kotlin// app/src/main/kotlin/Main.kt import com.example.annotations.HelloWorldAnnotation @HelloWorldAnnotation fun main() { helloWorld() }main()函数调用了helloWorld(),尽管这个函数目前还不存在。您的 IDE 会将helloWorld()高亮显示为未定义的引用。这是正常现象:当您构建并运行项目时,KSP 会生成helloWorld()函数。运行程序。您会在控制台中看到
helloWorld()函数的输出:textHello world from function generated by KSPKSP 会在
GeneratedHelloWorld.kt文件中生成代码:textapp/build/generated/ksp/main/kotlin/GeneratedHelloWorld.kt
探索项目结构
您的项目最终文件结构应如下所示:
.
├── app
│   ├── build.gradle.kts
│   └── src
│       └── main
│           └── kotlin
│               └── Main.kt
├── annotations
│   ├── build.gradle.kts
│   └── src
│       └── main
│           └── kotlin
|				└── com
|	                └── example
|						└── annotations
|							└── HelloWorldAnnotation.kt
├── processor
│   ├── build.gradle.kts
│   └── src
│       └── main
│           ├── kotlin
│           │   ├── HelloWorldProcessor.kt
│           │   └── HelloWorldProcessorProvider.kt
│           └── resources/META-INF/services
|				└── com.google.devtools.ksp.processing.SymbolProcessorProvider
├── build.gradle.kts
└── settings.gradle.kts
您可能还有其他文件和目录。